
Overview
Force Fleet Tracking (formerly known as Force by Mojio) is a GPS-based fleet management solution offering real-time vehicle tracking, driver behavior monitoring, and vehicle health diagnostics.
Integrating Force Fleet Tracking with Jobber makes it seamless to view the location and status of your vehicles in the same place you manage the rest of your operations. Using the integration, you will know where your vehicles are at any given time so you can make scheduling decisions on the fly and gain insight into your employees productivity, along with fuel costs and vehicle health.
Force Fleet Tracking Availability
The Force Fleet Tracking integration is available on select plans in the United States. The Force Fleet Tracking integration is not available while in trial.
To check what plan you’re on, navigate to the Gear Icon > Account and Billing. If you have any questions about your plan’s features or pricing, our support team is here to help!
Get set up with devices from Force Fleet Tracking
Vehicle tracking with Force Fleet Tracking requires a purchase of a GPS tracker and an active subscription with Force Fleet Tracking.
Force Fleet Tracking offers two tracking devices. Learn more about each below.
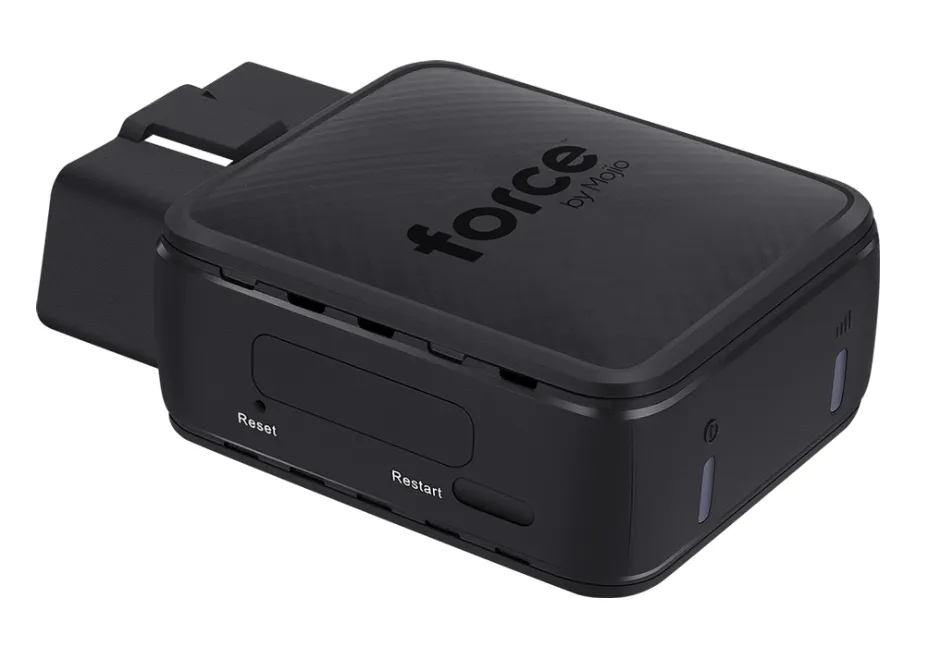
Traditional OBD-II Port GPS Trackers
These devices come with a 4G SIM card embedded and plug into the OBD-II port under the steering wheel of the vehicle to get power and vehicle diagnostic information. No recharging of the battery is required.
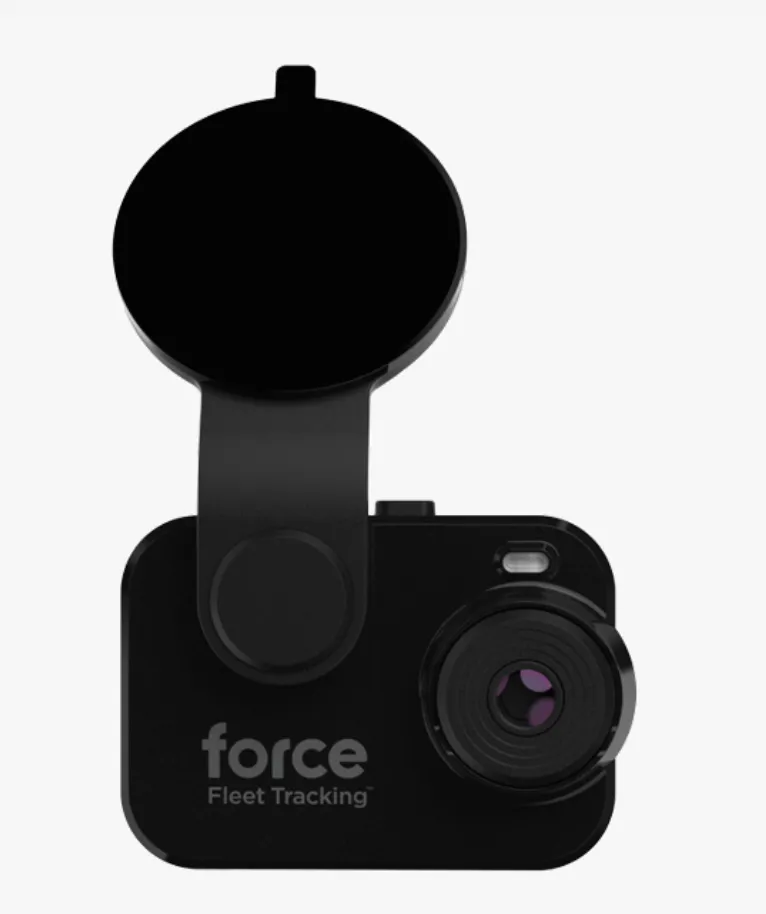
Dual-facing Dashcam Trackers
These devices come with a 4G LTE SIM card embedded, a suction mount lock for attaching to the inside of vehicle windshield, and a cable and OBD-II port adapter for getting power and vehicle diagnostic information. No recharging of the battery is required.
Connect Jobber and Force Fleet Tracking
There are two ways to connect Jobber and Force Fleet Tracking, depending on if you already have a Force Fleet Tracking account and subscription.
To connect Jobber to Force Fleet Tracking, follow these steps:
- Sign into Jobber.com, then select Apps from the side navigation.
- From the App Marketplace, select Force: Fleet Tracking.
- From the Force: Fleet Tracking header, select Connect.
- Select one of these options based on your needs:
- If you need to purchase Force Fleet Tracking devices, select Get Started.
- If you already have a Force Fleet Tracking account and subscription, select Connect.
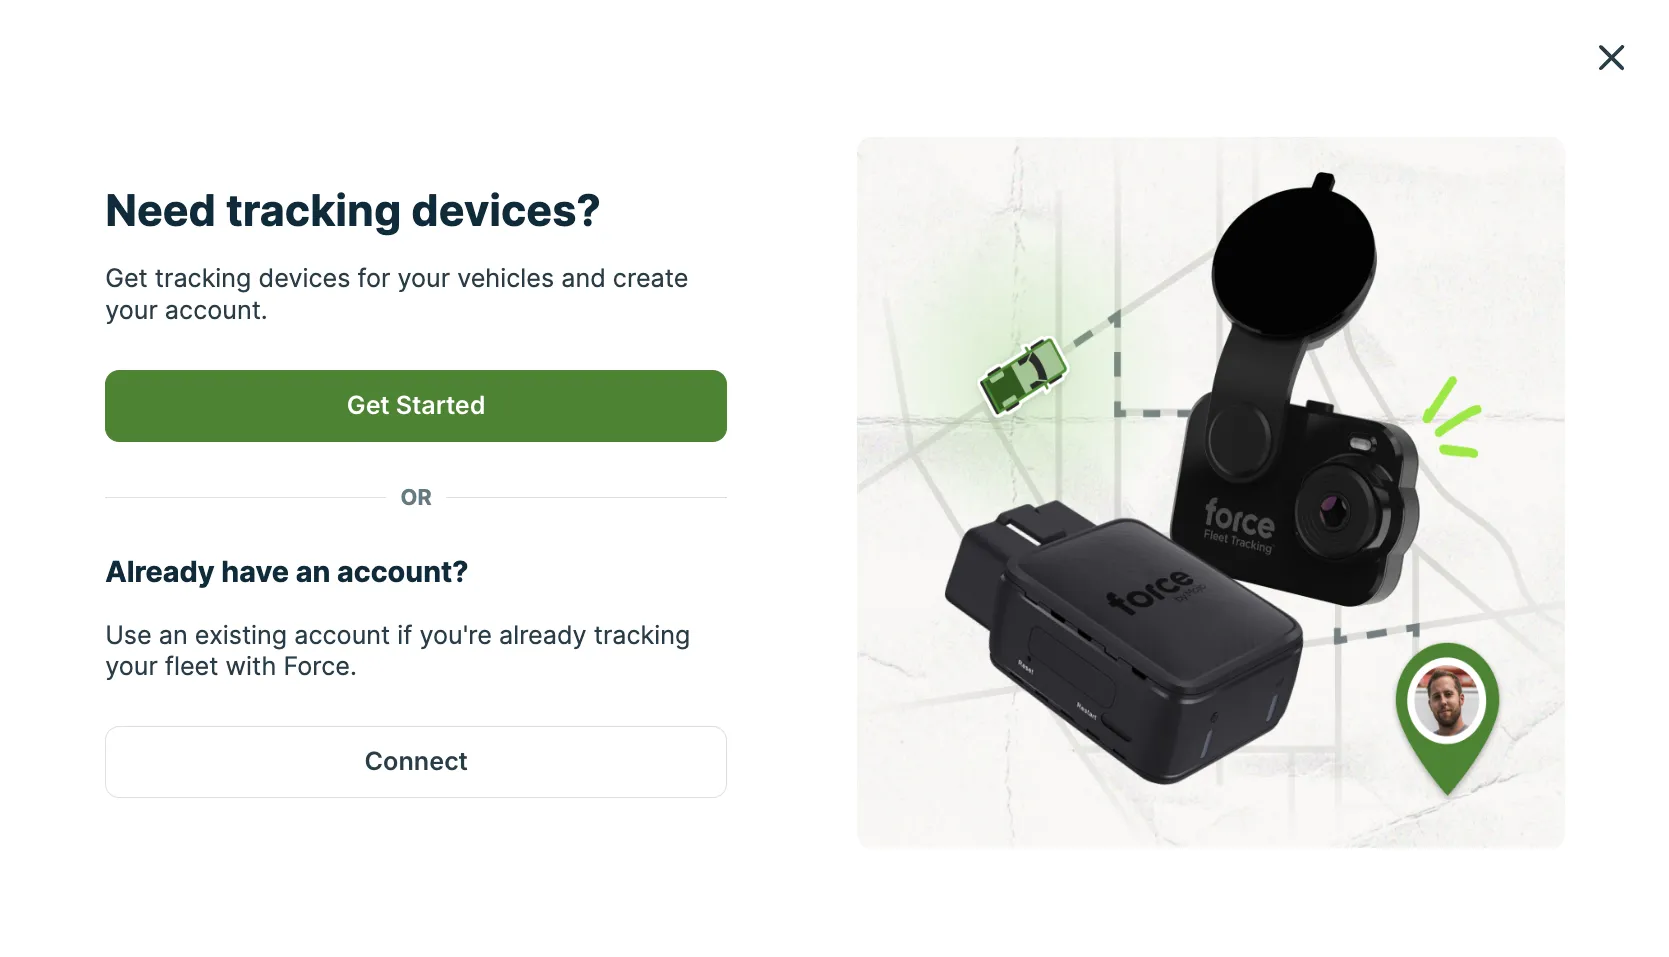
If you selected Get Started, you will be prompted to enter your:
- Email address
- Company name
- Number of devices to purchase
- Shipping address
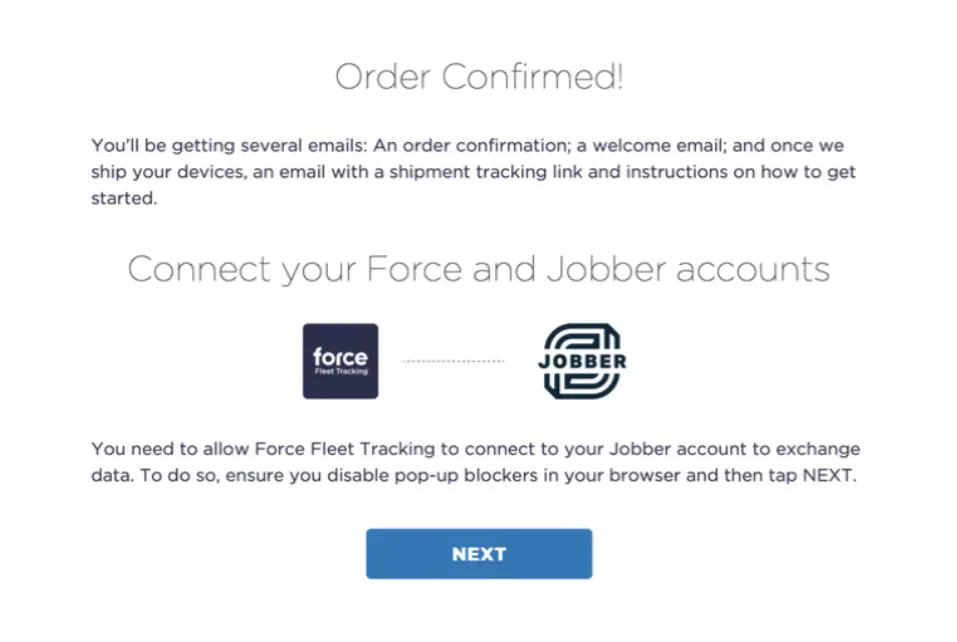
Once your checkout is complete, you will be prompted to authorize the Force Fleet Tracking integration to access the listed information from your Jobber account. Select Next.
Note
You won’t have a Force Fleet Tracking login yet. You’ll be getting several emails from Force Fleet Tracking including:
- Your order confirmation
- A welcome email
- Once the order ships, a shipping notification that includes a tracking link and instructions on how to set up your Force Fleet Tracking account
The emails will come from customerservice@forcefleettracking.com.
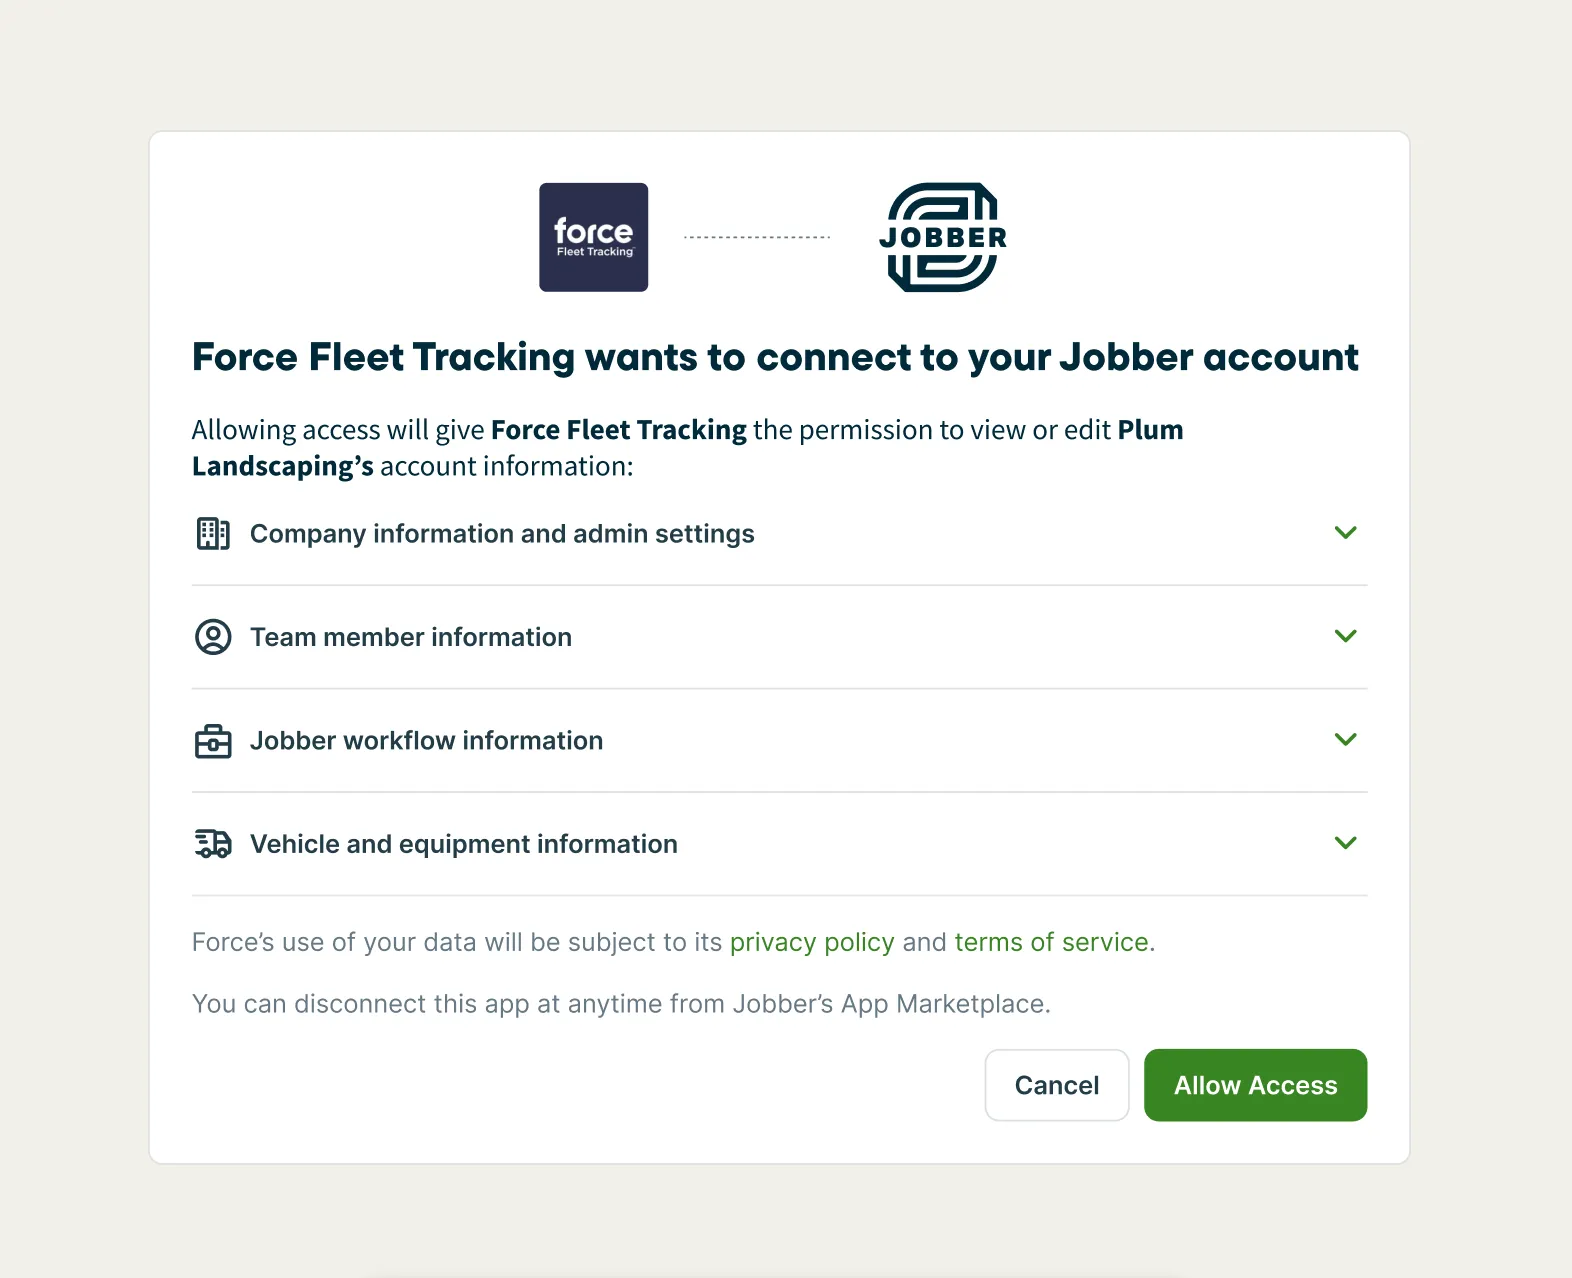
If you selected the I already have an account option, this will be the next step in the setup. Select Allow Access.
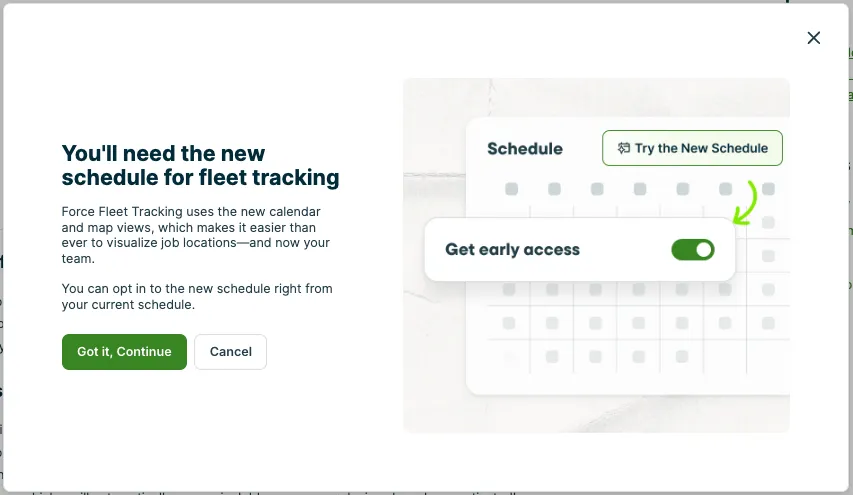
The Force Fleet Tracking Integration is only available through the new schedule in Jobber. In the connection flow, you’ll see a pop-up informing you about using the new schedule going forward. If you haven’t already done so, you’ll need to select Try the New Schedule at the top of the schedule and make sure that New Schedule is toggled on. If you are attempting to use the old schedule views, vehicles will not show up on the map.
Select Got it, Continue to complete the setup.
Configure your vehicles
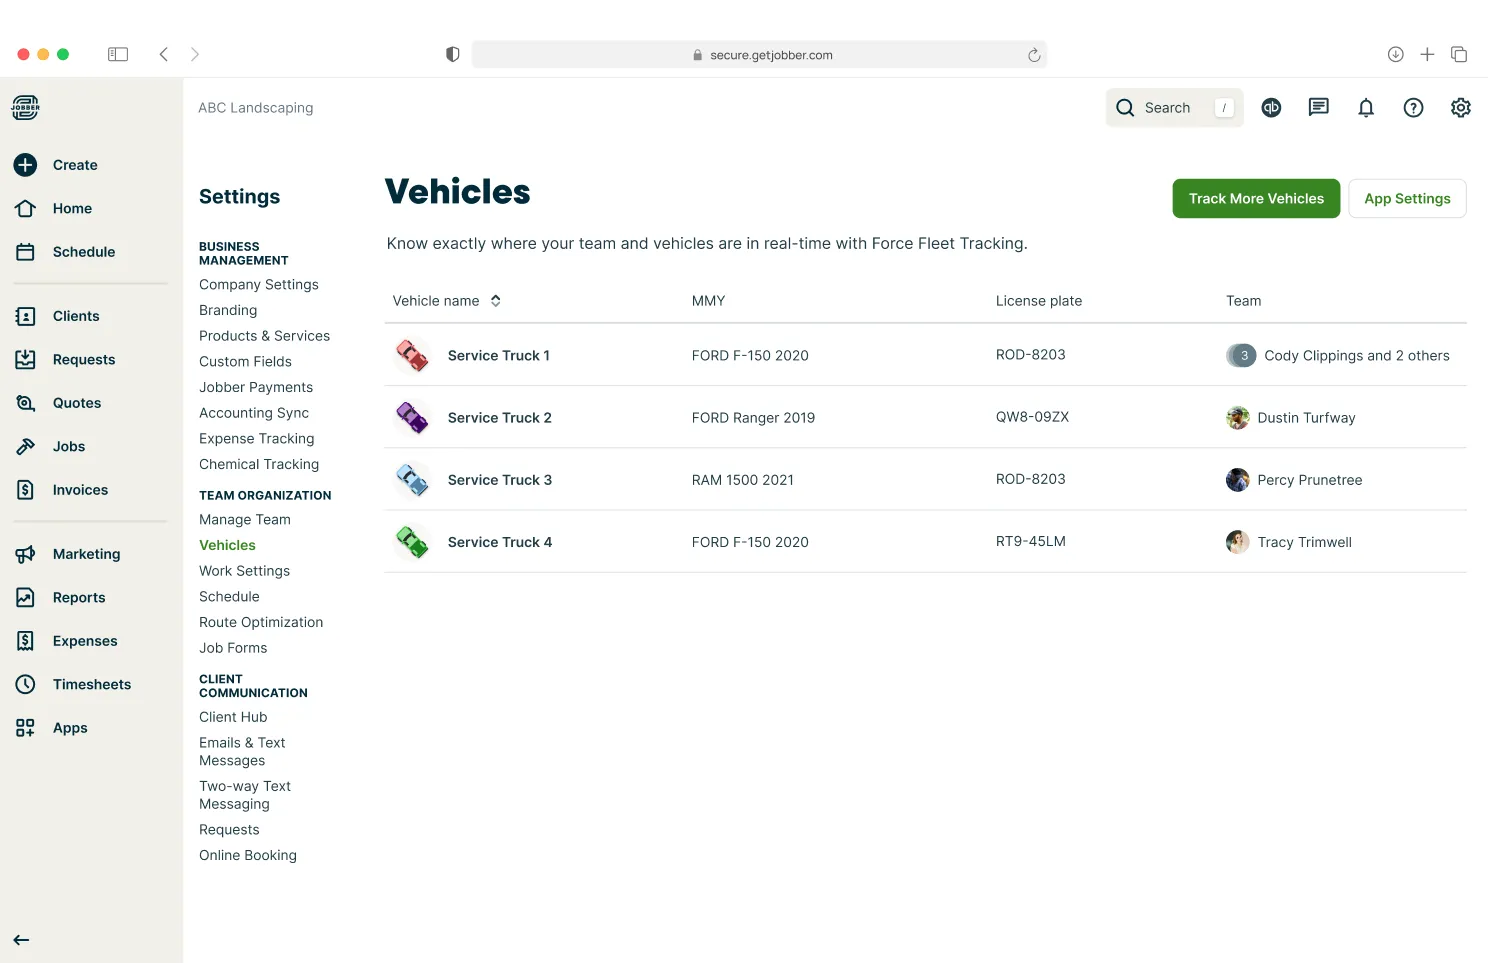
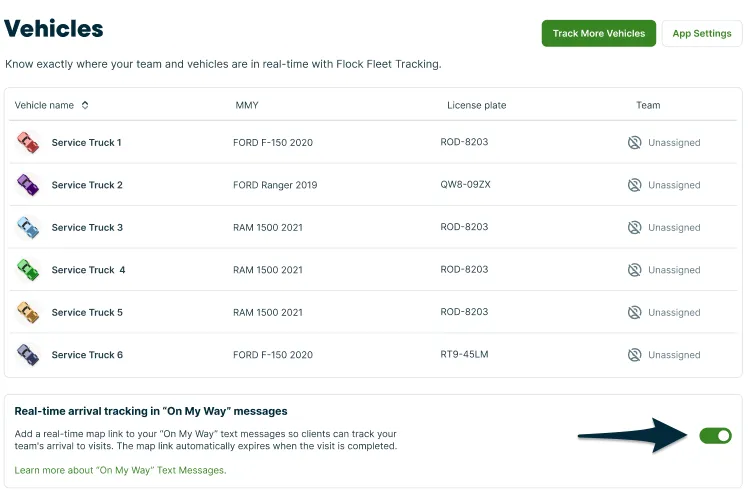
Once the Force Fleet Tracking integration has been setup, there will be a new settings page where vehicles are managed. Admin users can navigate to the Gear Icon > Settings > Vehicles to manage their devices.
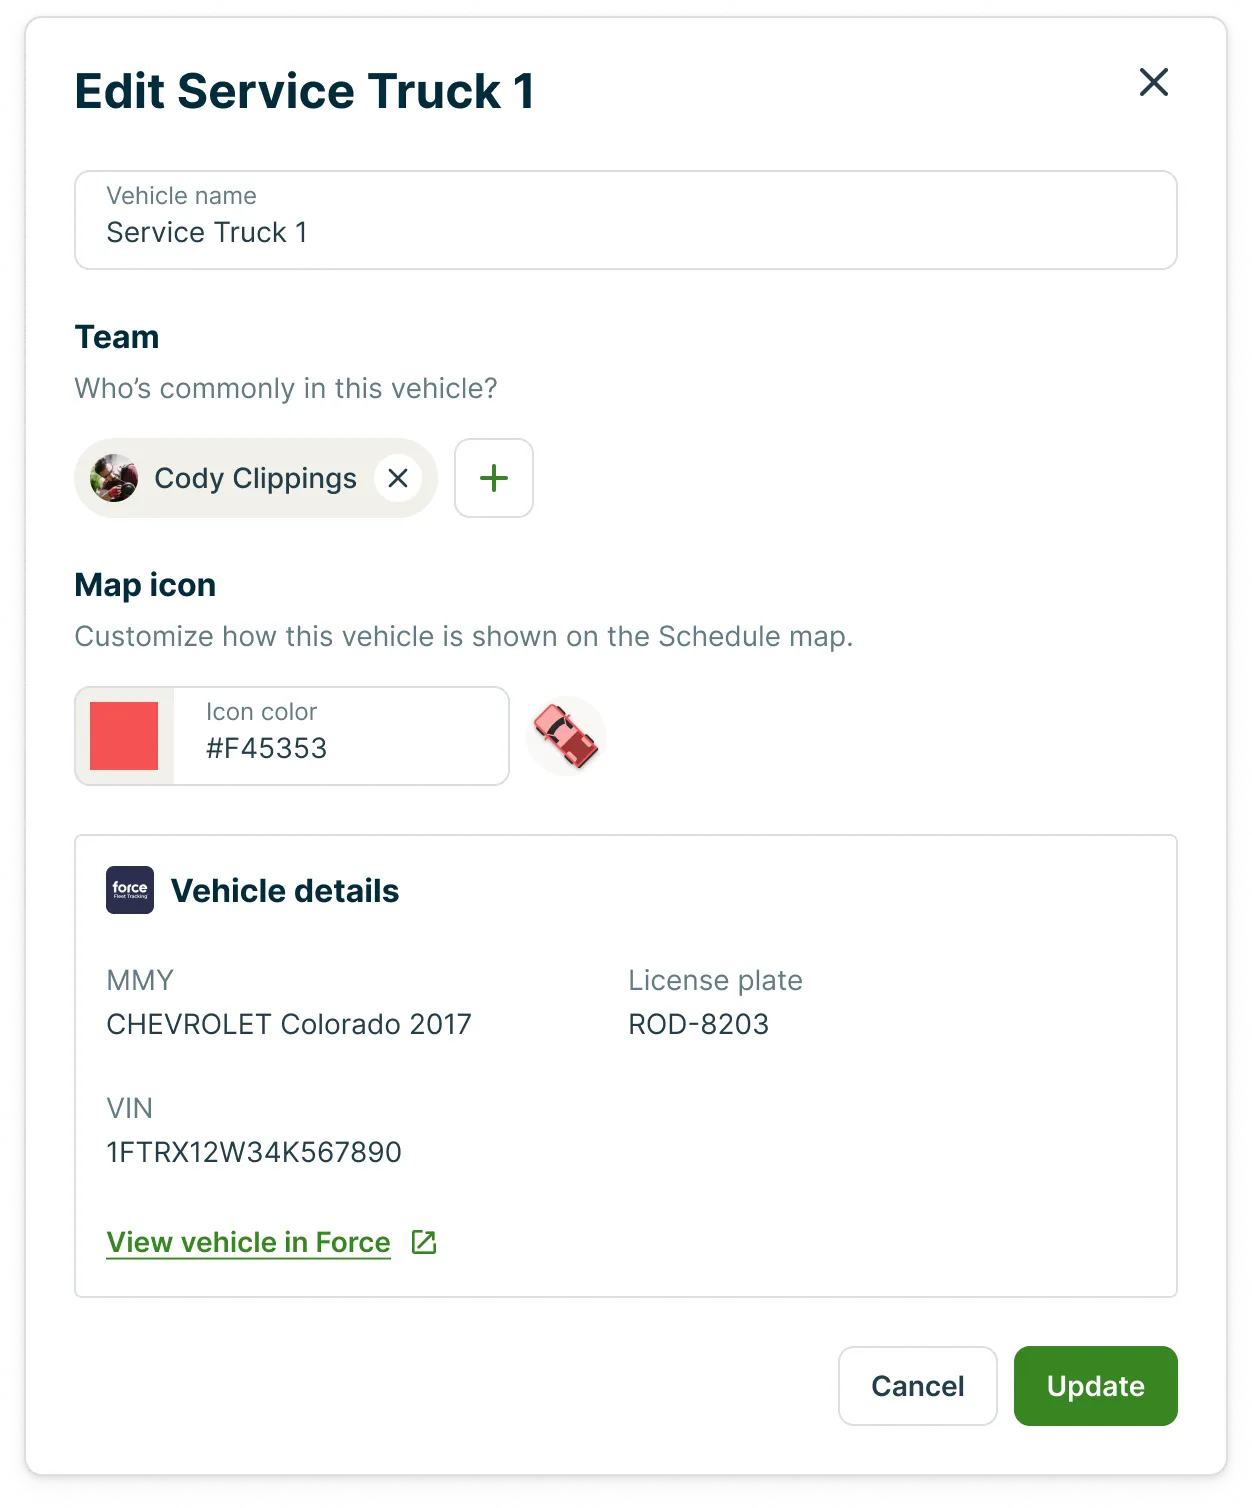
Once your devices have been plugged into the OBD-II ports of your vehicles they will appear in a list on the Vehicles settings page. Select a vehicle from the list to view and edit the vehicle’s details, including:
- Vehicle name: How would you like to refer to this vehicle? This field is optional. If it’s not filled out in Jobber, the vehicle name will match the vehicle name in Force Fleet Tracking.
- Team: Add the team members who are commonly in this vehicle. Team members can only be assigned to one vehicle at a time. Vehicle assignments will show up on the schedule for easy reference of where team members are currently located. Learn more about viewing vehicles on the schedule.
- Map icon: Select the icon color of your vehicle.
- Vehicle details: These fields aren’t editable in Jobber and will be populated by the tracker. Vehicle details include:
- Make, model, and year
- VIN
- Licence plate (as entered within Force Fleet Tracking)
View vehicles on the schedule
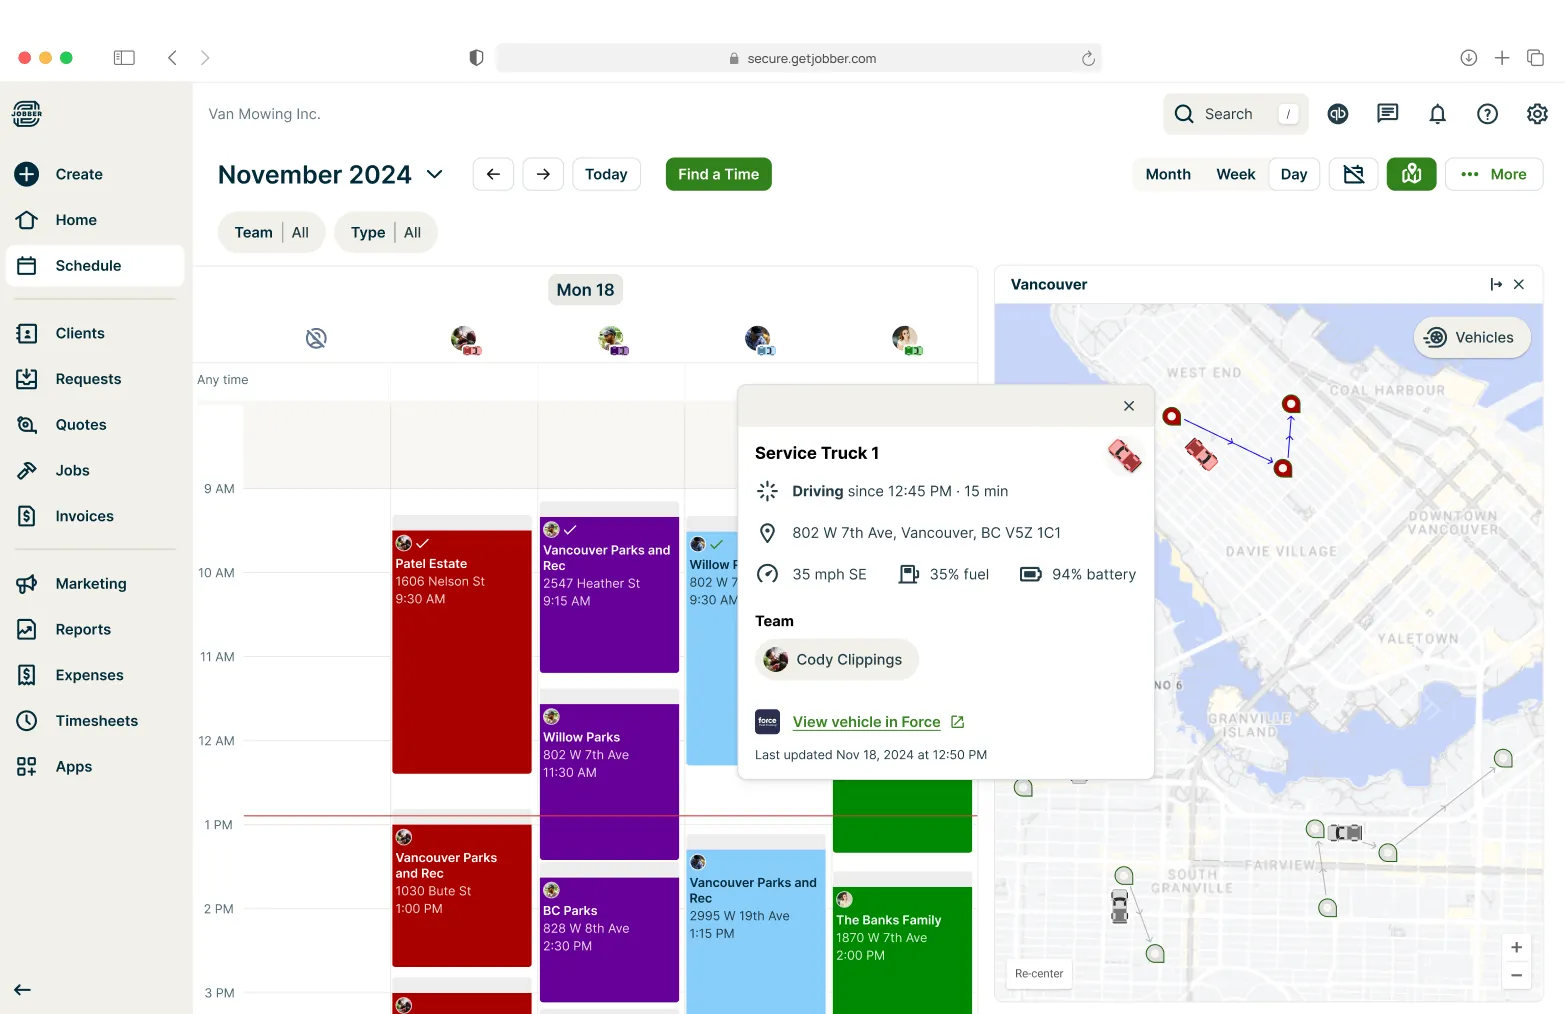
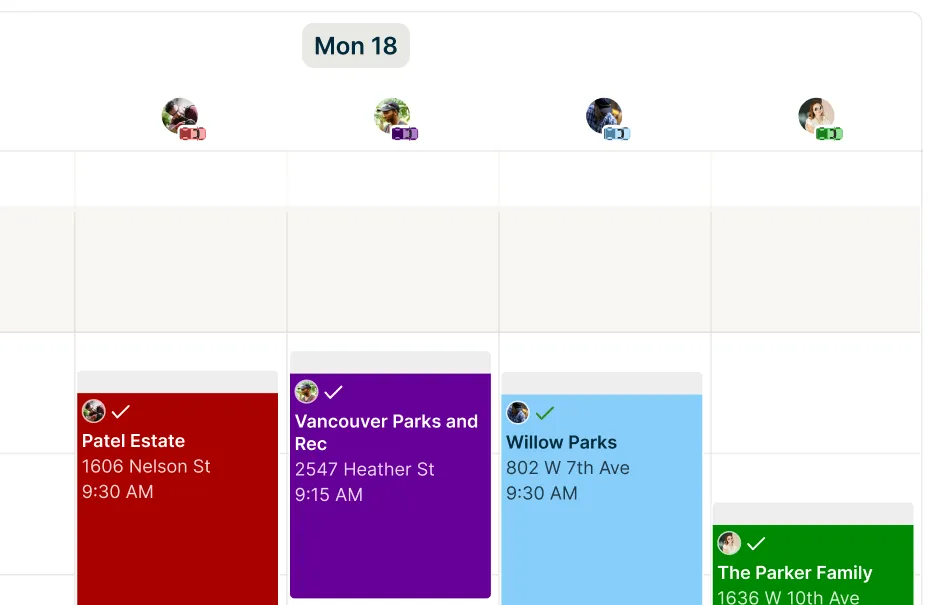
Once your vehicles are configured they will appear on the new schedule as icons along with your team member’s avatars so you can tell at a quick glance which team member is in each vehicle and where they currently are on the map.
To see your vehicles on the map, select the map icon to open the map drawer. Vehicles will appear based on the team members selected in the Team filter. Make sure to select team members in the filter for their vehicles to show on the map.
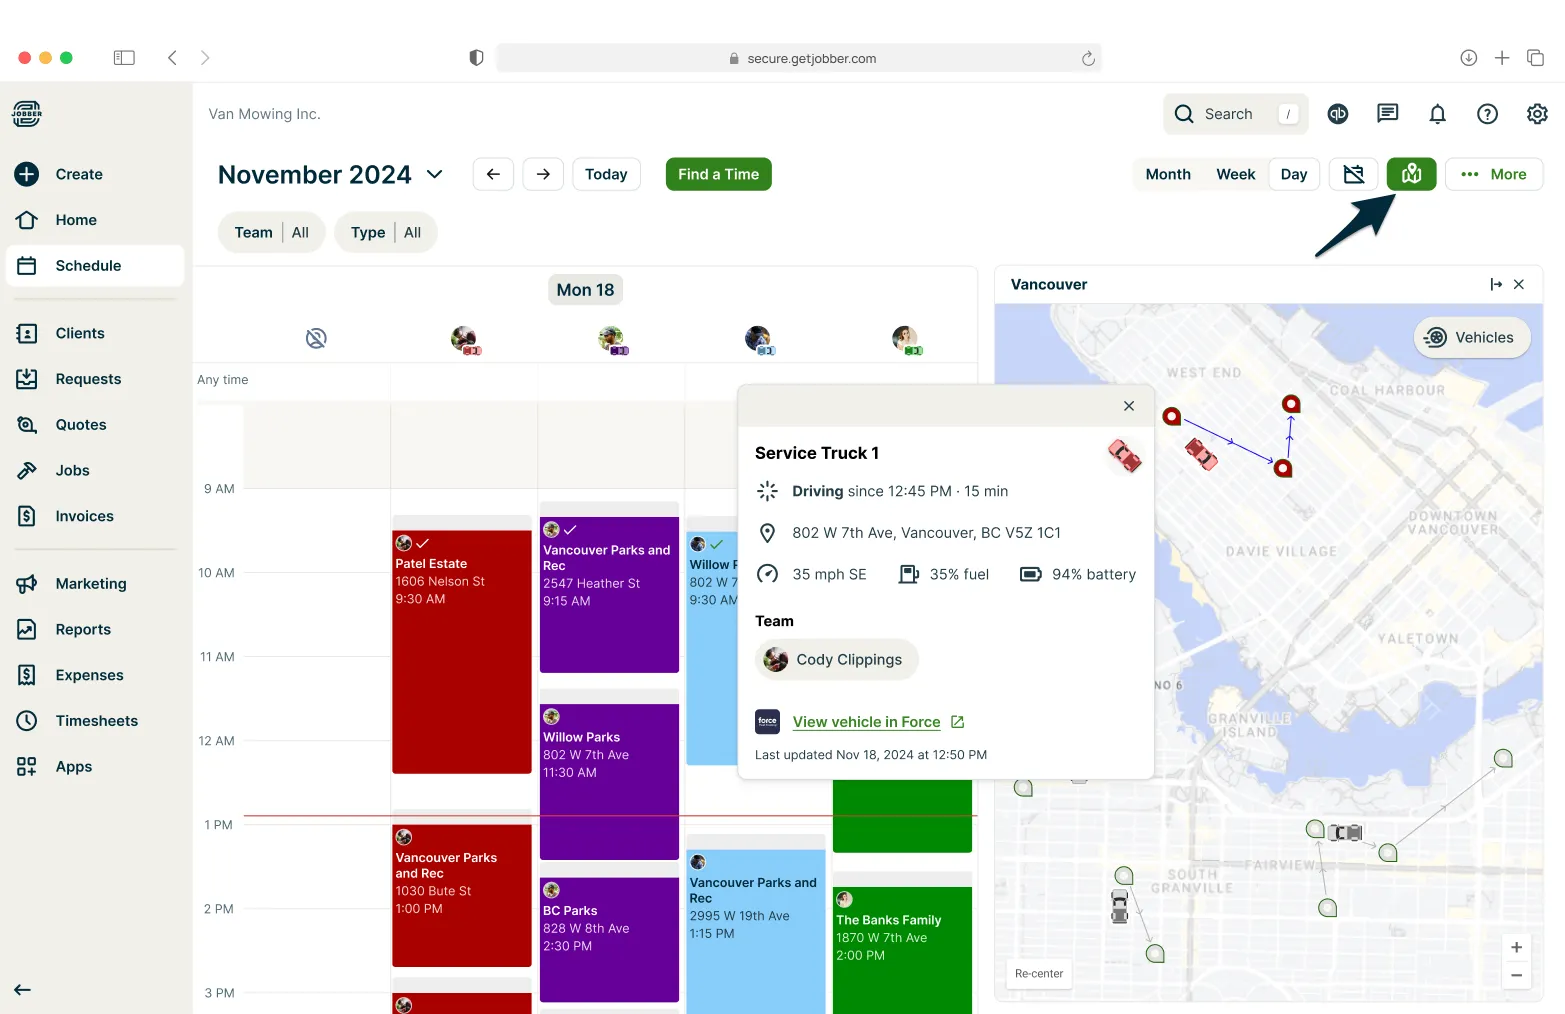
From the map, select a vehicle to see an overview of the vehicle including:
- Current status (Driving, idle, off, syncing location, or status unavailable)
- Nearest address
- Current speed and direction
- Current fuel level (percentage)
- Current battery level (voltage)
- Assigned team members
- Link to view the vehicle in Force Fleet Tracking
- Last updated timestamp
Send an “On My Way” text message with your vehicle’s real-time location
The Force Fleet Tracking integration can be connected to Jobber’s “On My Way” text message feature so that when your clients receive an “On My Way” text message, they can track your arrival by viewing your vehicle’s real-time location. Admin users can turn real-time arrival tracking on or off.
In order for real-time arrival tracking to be included in the “On My Way” message, the following three conditions must be met:
- A team member is using the Jobber Mobile App and taps the On My Way button before heading to a visit.
- The same team member is assigned to a vehicle in your Vehicle settings on Jobber.com.
- The vehicle assigned to that user must have a recent GPS location update (within the last 12 hours) from the Force Fleet Tracking integration.
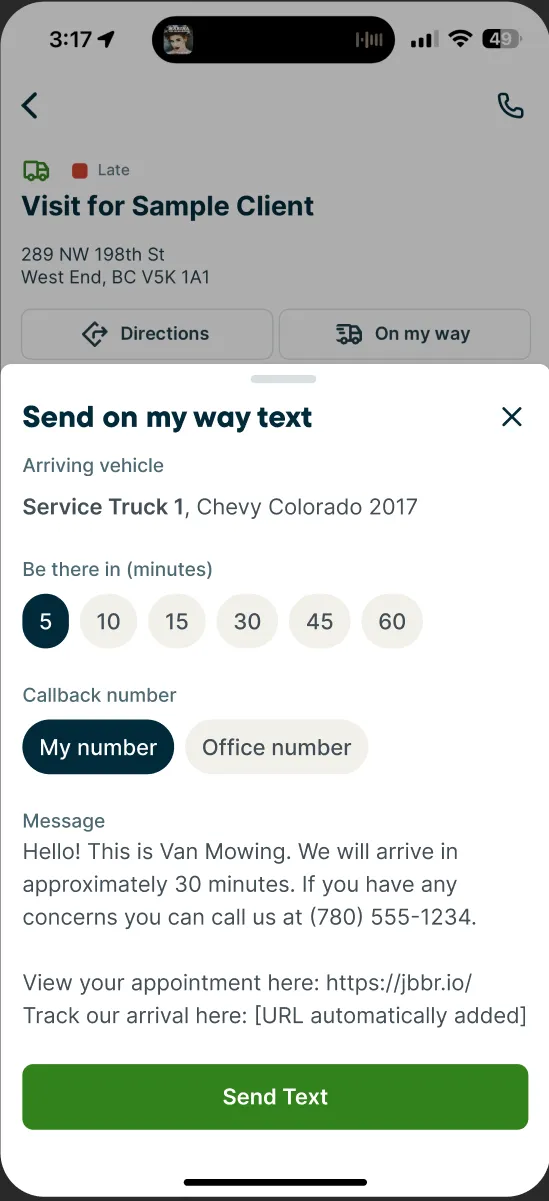
When all three conditions are met, the Jobber App will show the name of the vehicle assigned to the team member in the On My Way text message preview screen under Arriving vehicle. This lets the team member confirm they’re assigned to the correct vehicle.
When the team member taps the Send Text button, the integration retrieves the most recent live tracking link for the vehicle and inserts it directly into the On My Way text message.
To protect privacy and avoid tracking outside of appointment times, tracking links automatically expire based on whichever of the following happens first:
- Two hours have passed since the original “On My Way” button was tapped
- The scheduled end time of the visit has passed.
- The visit is marked as completed in Jobber.
To turn real-time arrival tracking on or off:
- From Jobber.com, navigate to the Gear Icon then select Settings.
- From the settings menu, select Vehicles to open your Force Fleet Tracking settings.
- Set the Real-time arrival tracking in “On My Way” messages toggle to on or off.
Note
Depending on when you set up the integration between Jobber and Force Fleet Tracking, the Real-time arrival tracking in “On My Way” messages toggle may already be enabled by default:
- If you connected Jobber and Force Fleet Tracking before August 25, 2025, real-time arrival tracking will be defaulted to off.
- If you connected Jobber and Force Fleet Tracking on or after August 25, 2025, real-time arrival tracking will be defaulted to on.
Regardless of the default setting, real-time arrival tracking in “On My Way” messages can be enabled or disabled manually.
Get started with your newly received devices
After receiving your devices from Force Fleet Tracking, the next step is installation in your vehicle(s). Use the videos and step-by-step instructions below to guide you through the process. If you encounter any issues, troubleshooting resources are also linked below.
Tracker installation
Dashcam installation
Get support with Force Fleet Tracking and Jobber
If you have a support question about Force Fleet Tracking and Jobber, the Force Fleet team is available by phone at 806-855-8255.