
Overview
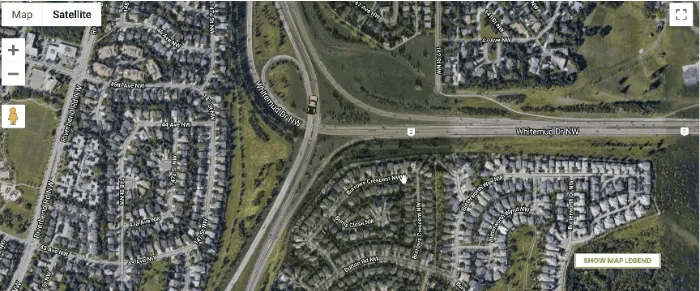
Track your vehicles in real time and use their location to make scheduling decisions based on location.
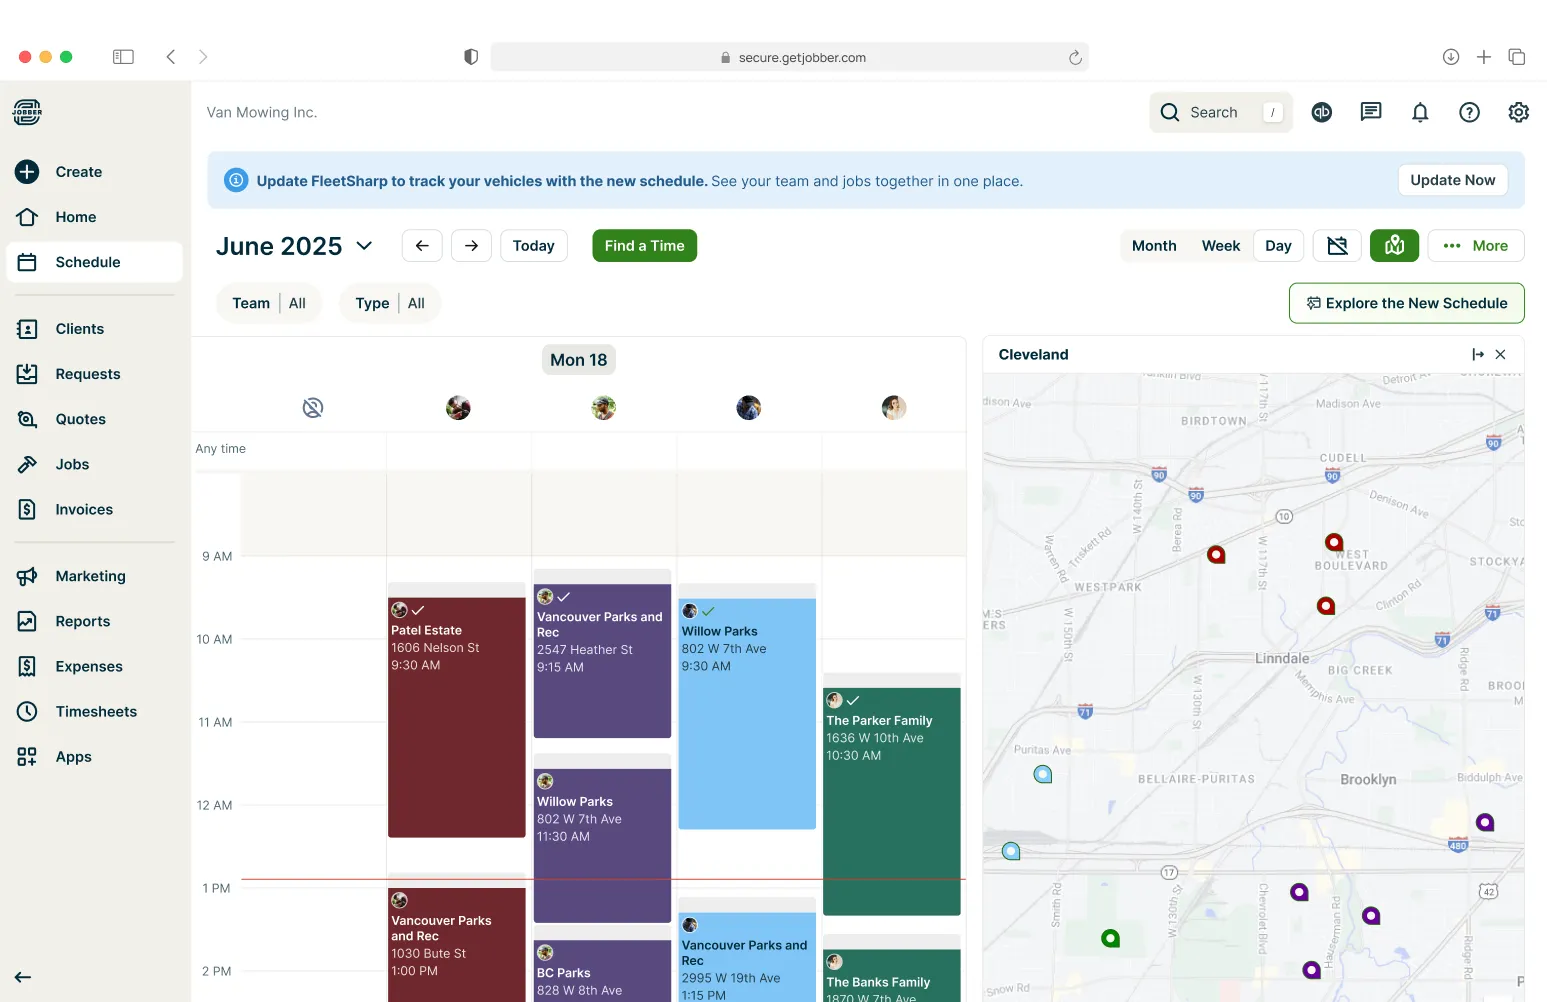
Using the FleetSharp integration, you will be able to view your trucks on the map view of the calendar in relation to your visits for the day. Being able to see the real time location of your team though FleetSharp’s GPS tracking will allow you to hold your employees accountable and schedule based on your team’s location. If and when that urgent call comes in, having the ability to see who is closest to the client’s location will come in handy.
Update to the New FleetSharp integration
If you set up the FleetSharp integration before July 2025, you are likely using the legacy version of the integration. The new version is supported on Jobber’s new schedule.
To update:
- Enable the new schedule in Jobber: Select the Schedule tab from the side navigation, then select Try the New Schedule and turn on the New Schedule toggle.
- Add the supplementary map to the schedule.
- Admin uses will now see a banner at the top of the schedule prompting them to update FleetSharp to track vehicles with the new schedule. Click Update Now
FleetSharp Integration Availability
The FleetSharp integration is available on select plans in the United States and Canada. View our current pricing plans.
To check what plan you’re on, select the Gear Icon, then choose Account and Billing. If you have any questions about your plan’s features or pricing, our support team is here to help!
Set up the FleetSharp integration
The FleetSharp integration is setup through the App Marketplace.
To connect Jobber to FleetSharp, follow these steps:
- Sign into Jobber.com, then select Apps from the side navigation.
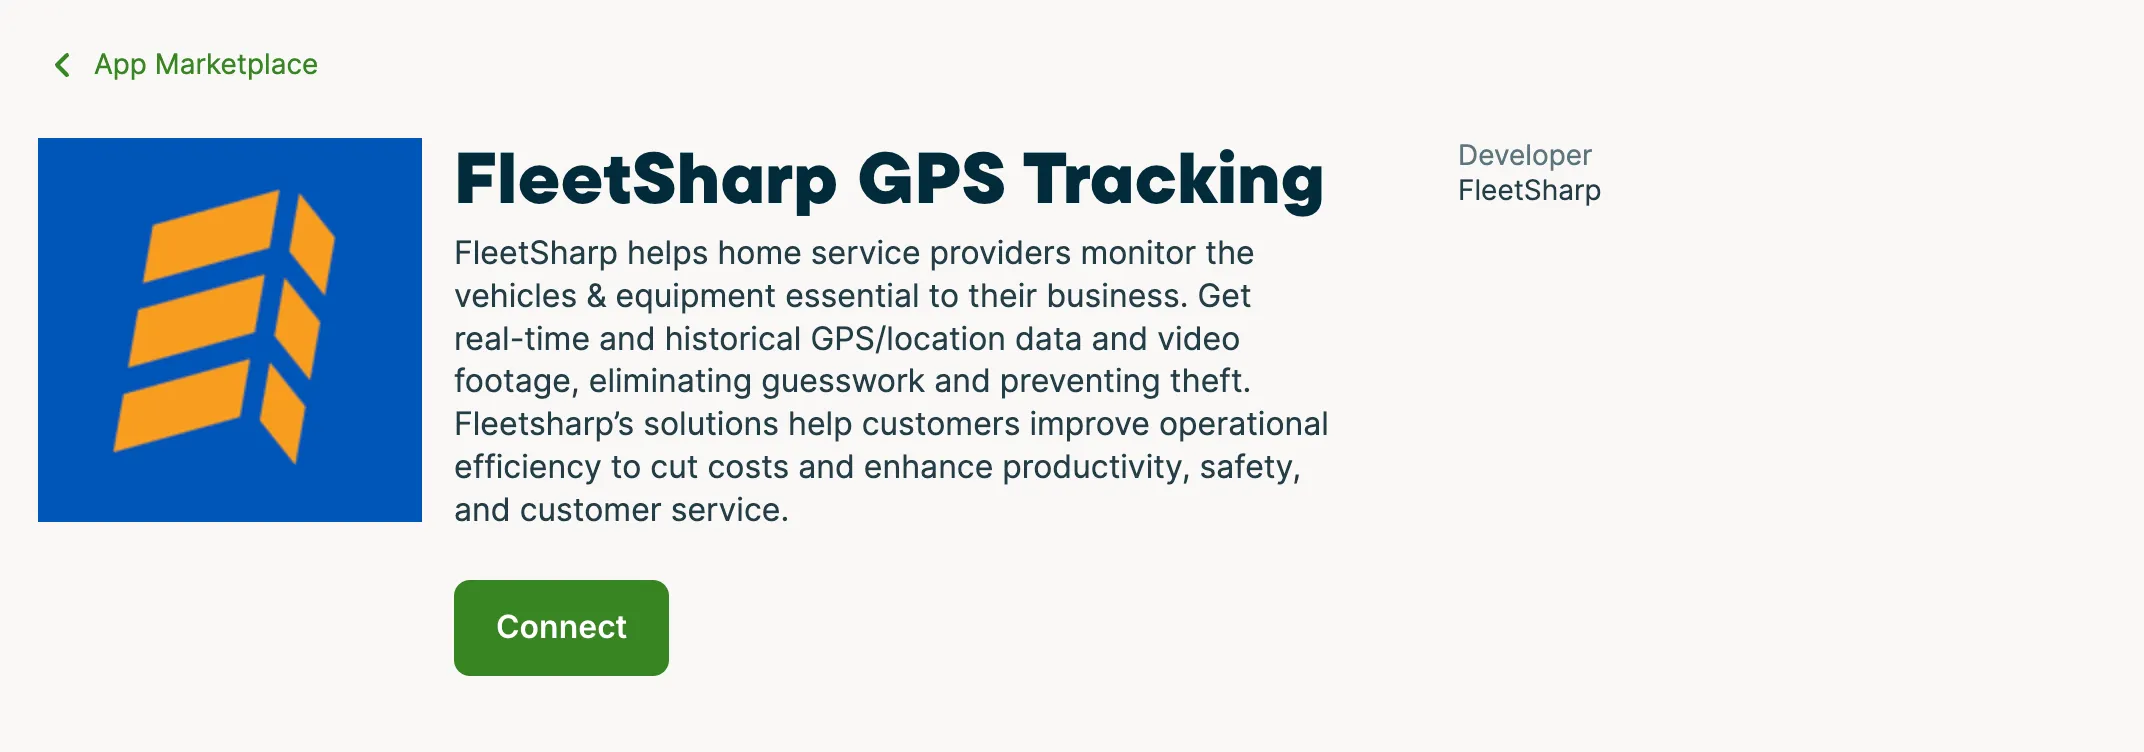
- From the App Marketplace, select FleetSharp GPS Tracking.
- From the FleetSharp GPS Tracking header, select Connect.
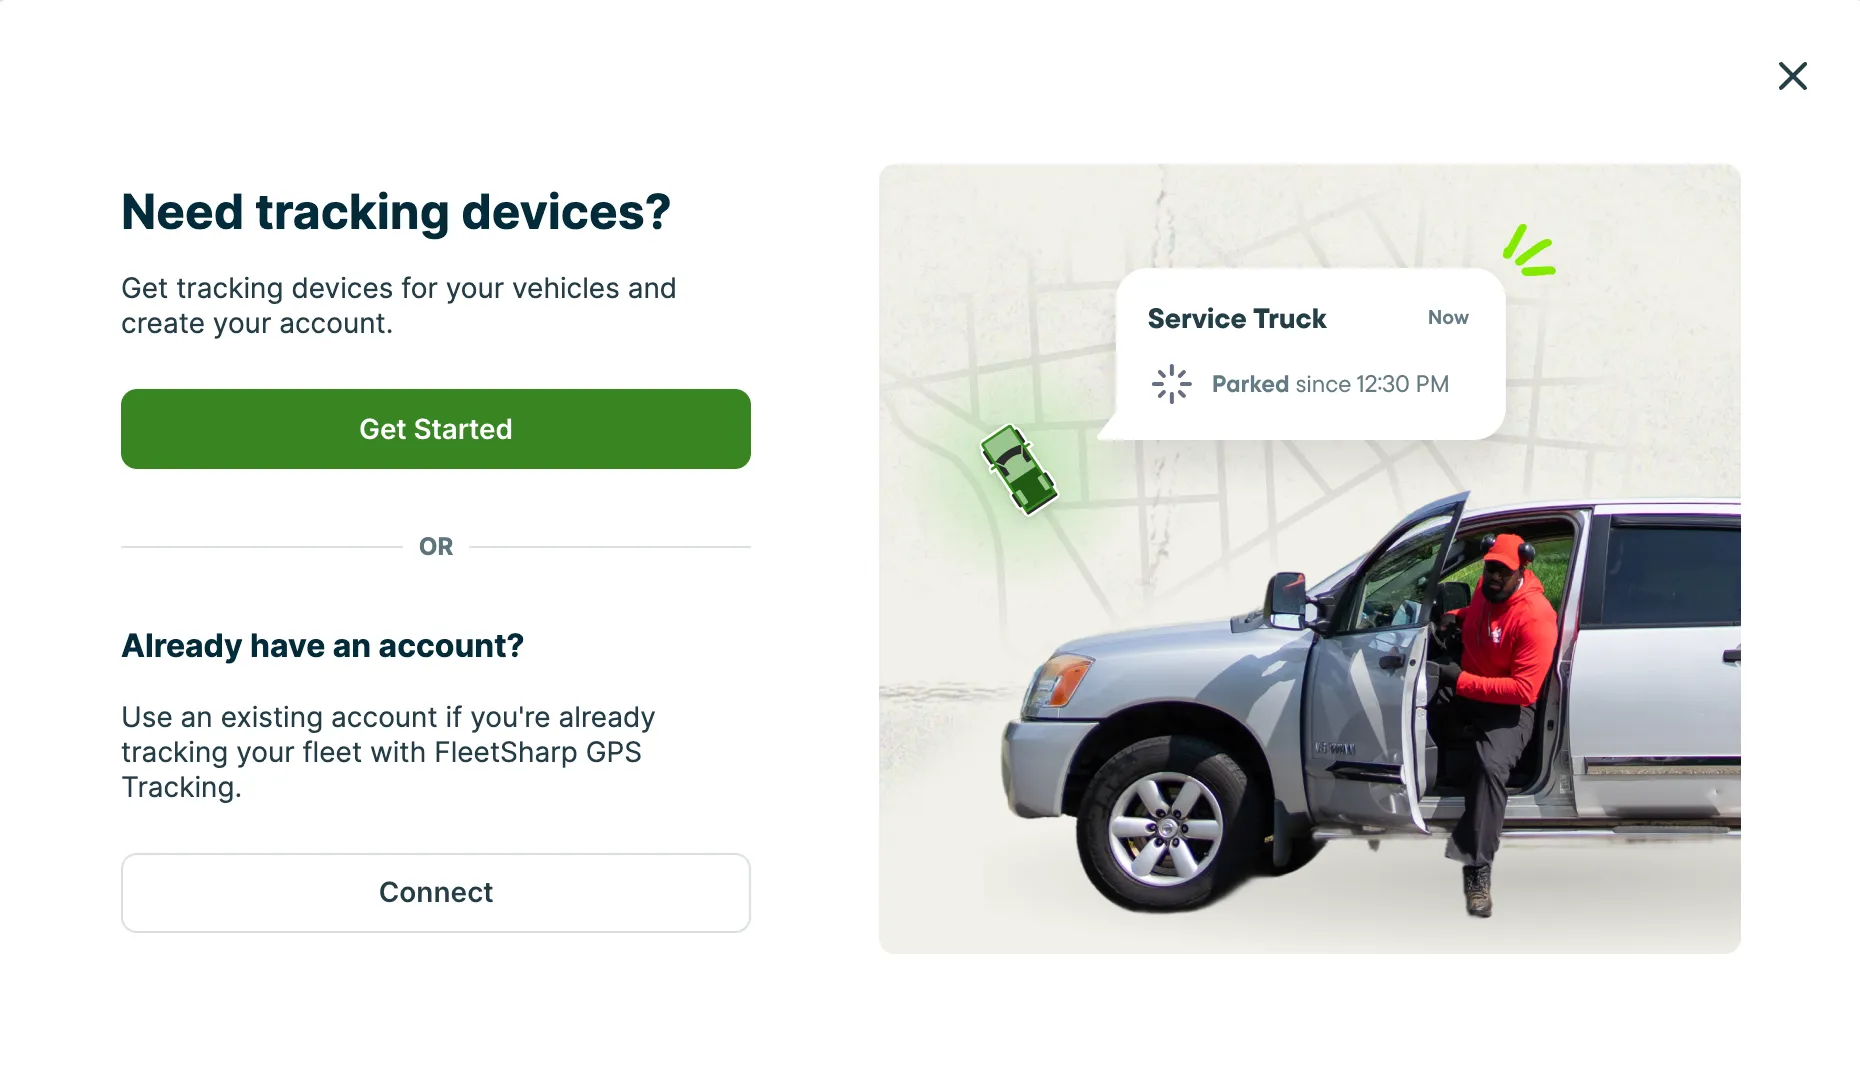
- Select one of these options based on your needs:
- If you need to purchase FleetSharp Tracking devices, select Get Started.
- If you already have a FleetSharp account and subscription, select Connect.
Note: You will need to order a FleetSharp device through this page in order to link the device to your Jobber account. If you already have a FleetSharp device, select Connect.
The FleetSharp integration uses Jobber’s new schedule. To opt into the new schedule, select the Schedule tab from the side navigation, then select Try the New Schedule and turn on the New Schedule toggle.
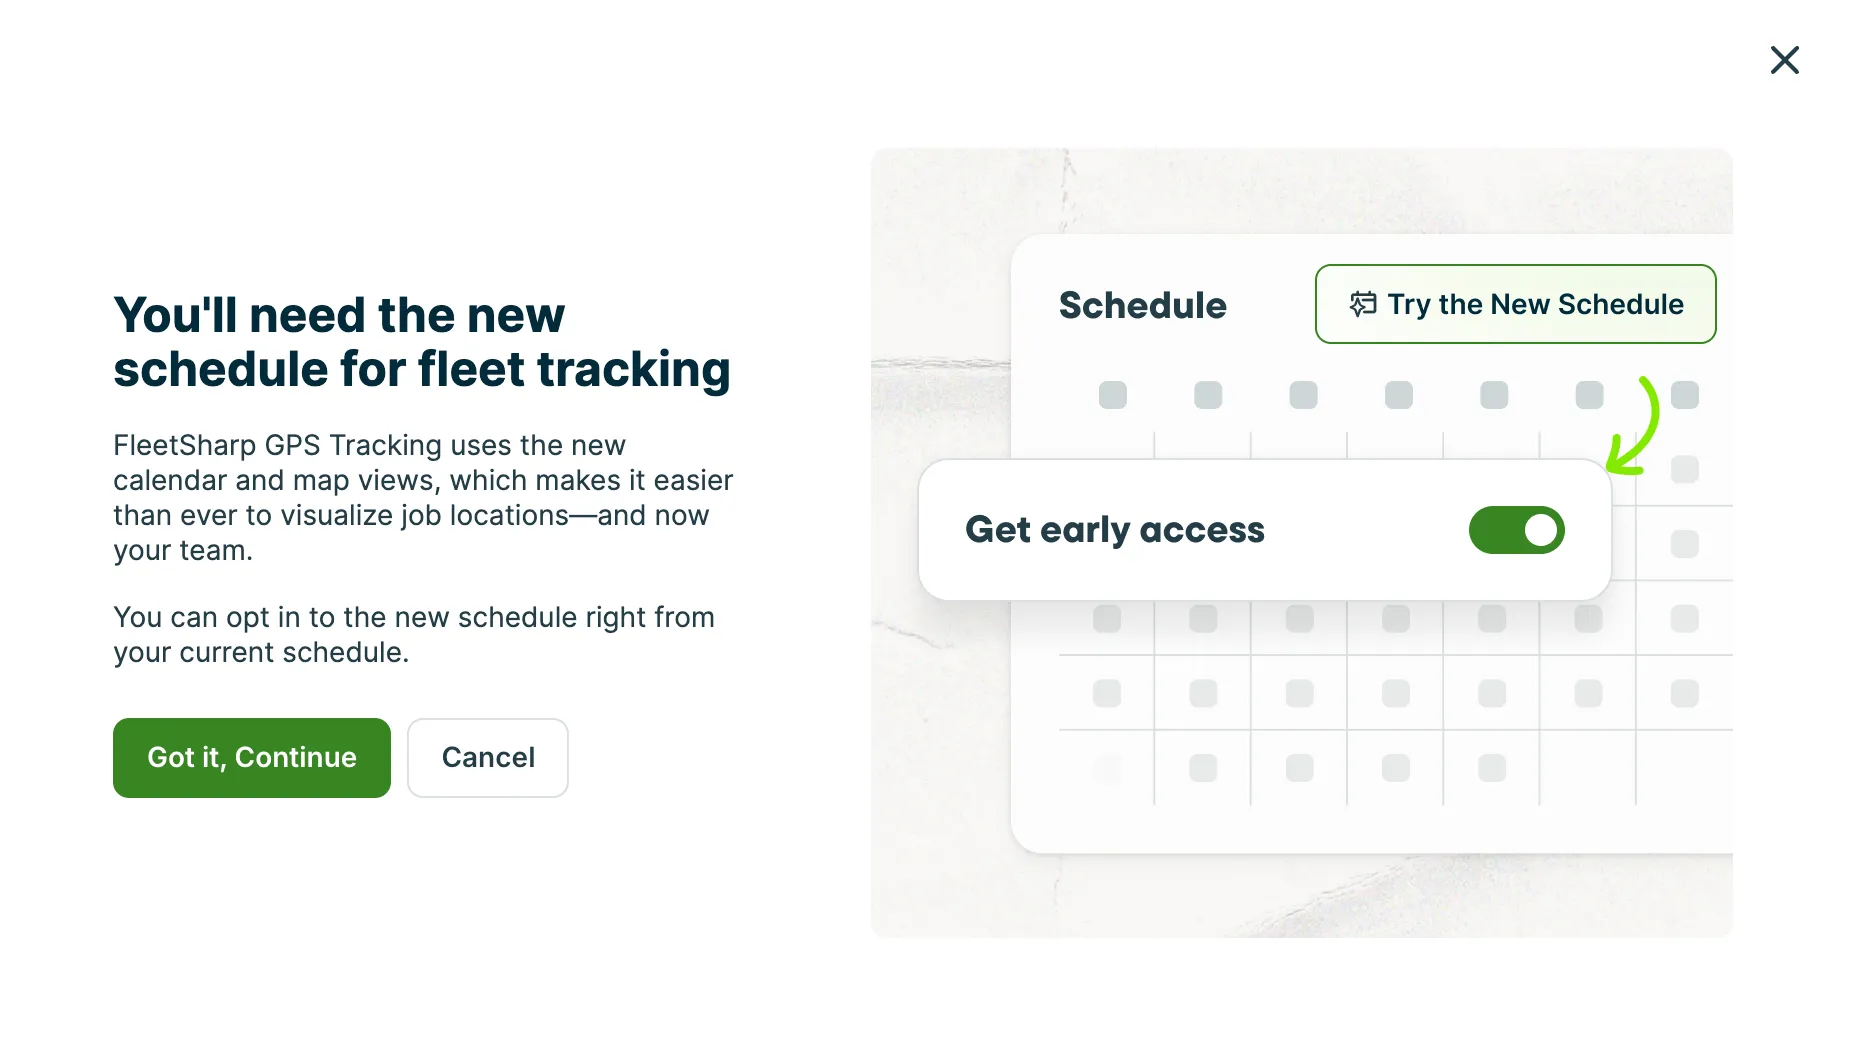
You will need to own a FleetSharp device to use the integration. The device plugs into your vehicle and contains a SIM card that sends information back to FleetSharp, they don’t rely on an internet connection or an app. Devices typically ship within 5 to 7 business days. We run an update nightly which will populate the vehicle on your map view of the calendar in Jobber the following day.
Configure your vehicles
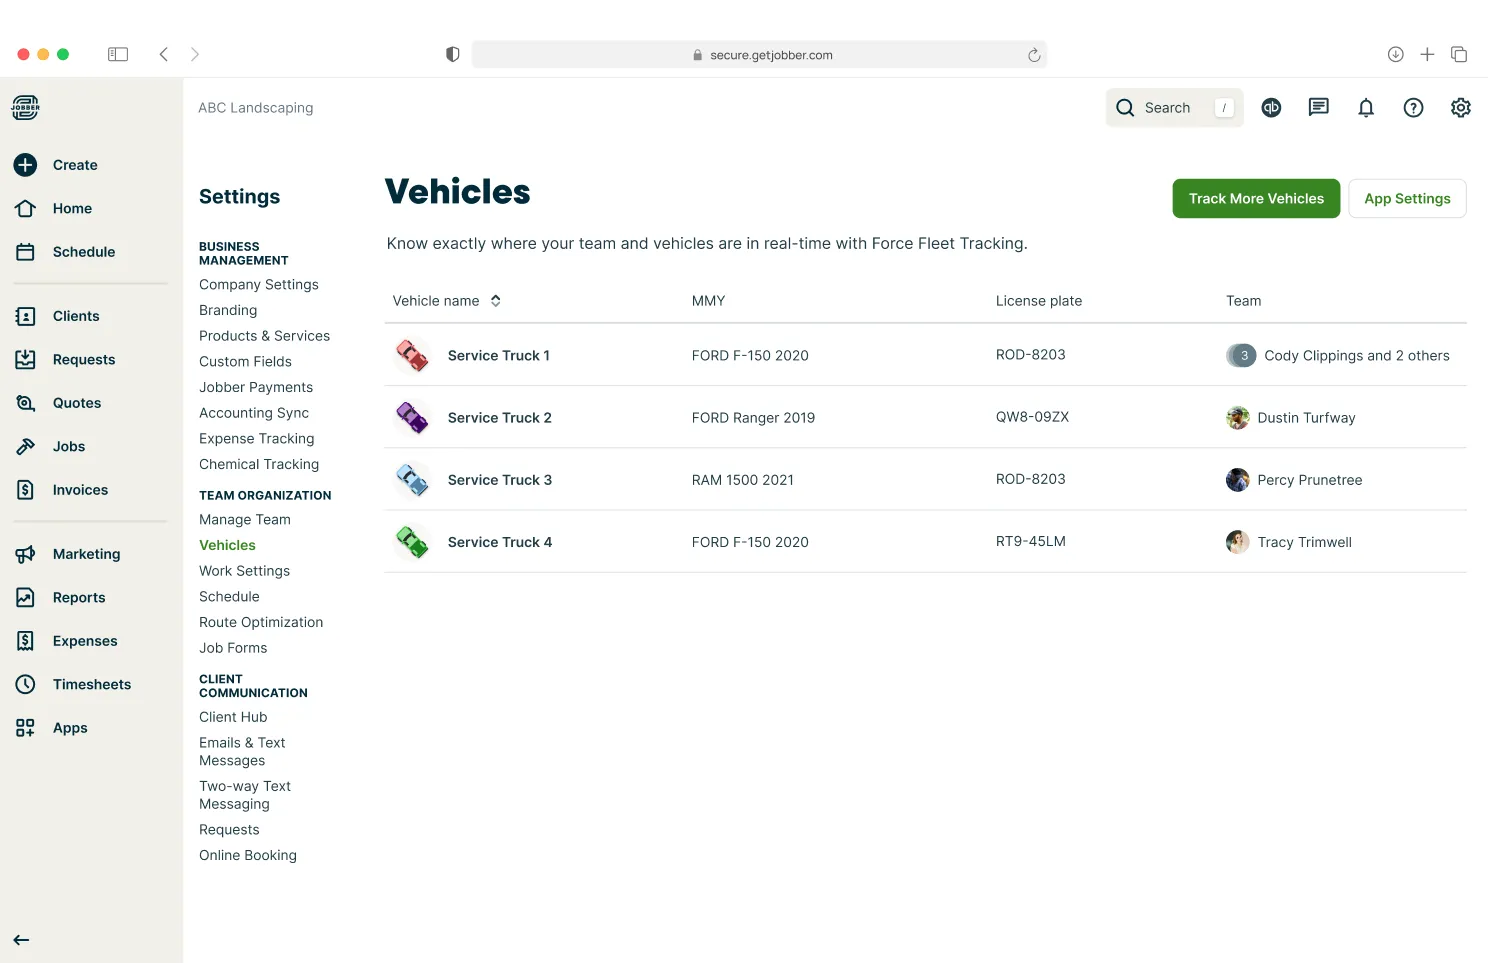
Once the FleetSharp integration has been setup, there will be a new settings page where vehicles are managed. Admin users can navigate to the Gear Icon then select Settings. From the settings menu, there will be a new tab for Vehicles where you can manage devices.
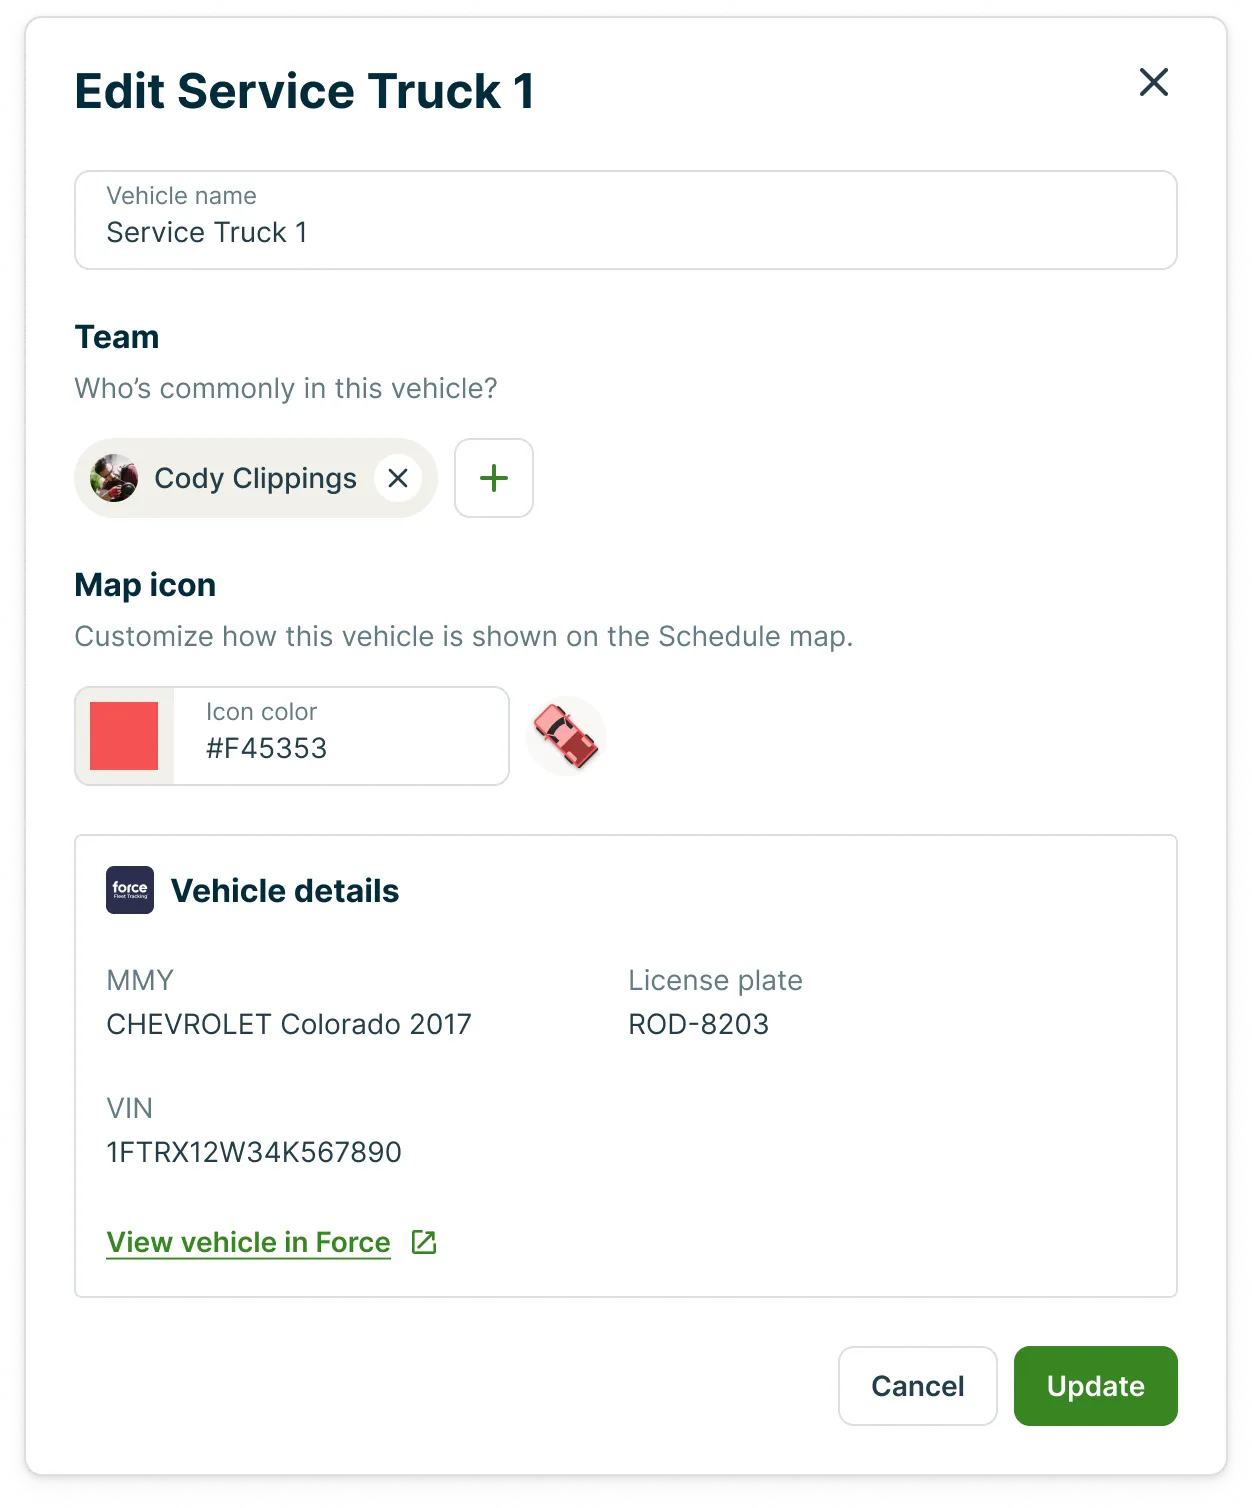
Once your devices have been plugged into your vehicles they will appear in a list on the Vehicles settings page. Select a vehicle from the list to view and edit the vehicle’s details, including:
- Vehicle name: How would you like to refer to this vehicle? This field is optional. If it’s not filled out in Jobber, the vehicle name will match the vehicle name in FleetSharp.
- Team: Add the team members who are commonly in this vehicle. Team members can only be assigned to one vehicle at a time. Vehicle assignments will show up on the schedule for easy reference of where team members are currently located. Learn more about viewing vehicles on the schedule.
- Map icon: Select the icon color of your vehicle.
- Vehicle details: These fields aren’t editable in Jobber and will be populated by the tracker. Vehicle details include:
-
Make, model, and year
-
VIN
-
Licence plate (as entered within FleetSharp)
View vehicles on the schedule
Once your vehicles are configured they will appear on the new schedule as icons along with your team member’s avatars so you can tell at a quick glance which team member is in each vehicle and where they currently are on the map.
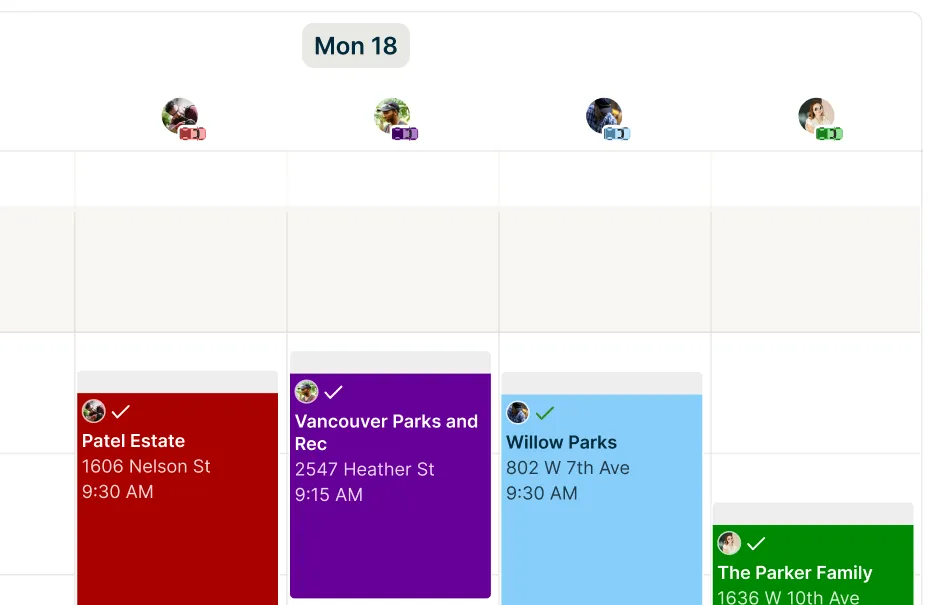
To see your vehicles on the map, select the map icon to open the map drawer. Vehicles will appear based on the team members selected in the Team filter. Make sure to select team members in the filter for their vehicles to show on the map.
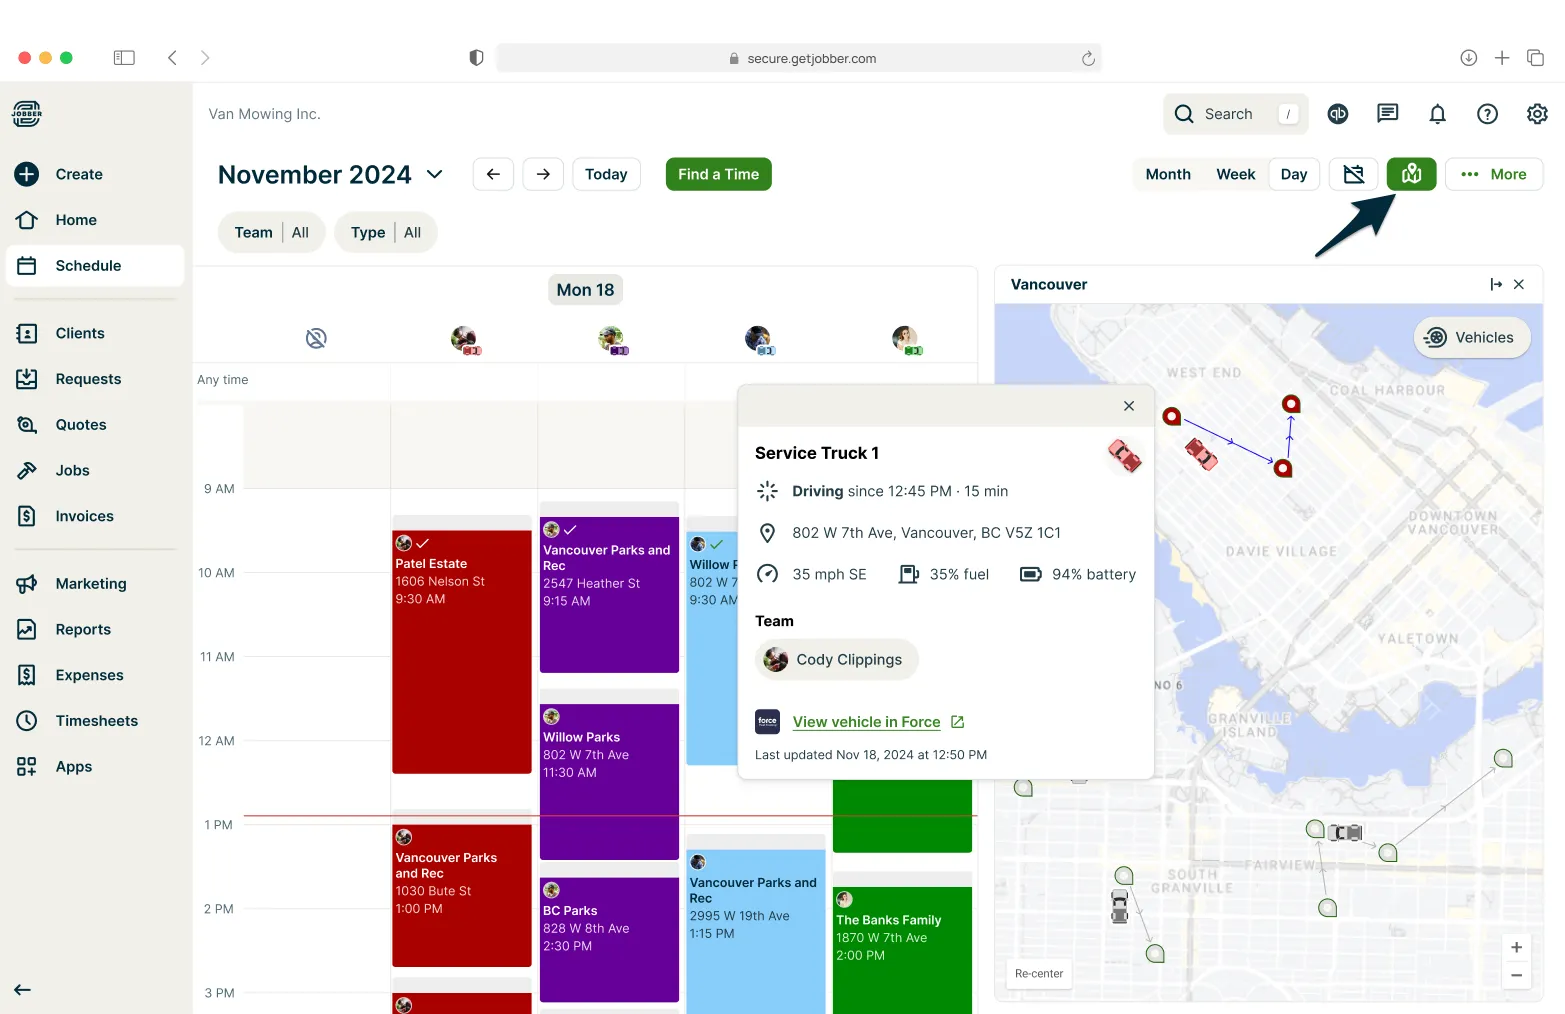
From the map, select a vehicle to see an overview of the vehicle including:
- Current status (Driving, idle, off, syncing location, or status unavailable)
- Nearest address
- Current speed and direction
- Current fuel level (percentage)
- Current battery level (voltage)
- Assigned team members
- Link to view the vehicle in FleetSharp
- Last updated timestamp
-
Legacy FleetSharp integration
If you haven’t updated to the new version of the FleetSharp integration, you will be using the legacy version.
The below sections show what your experience using the FleetSharp integration will look like.
Manage your vehicles
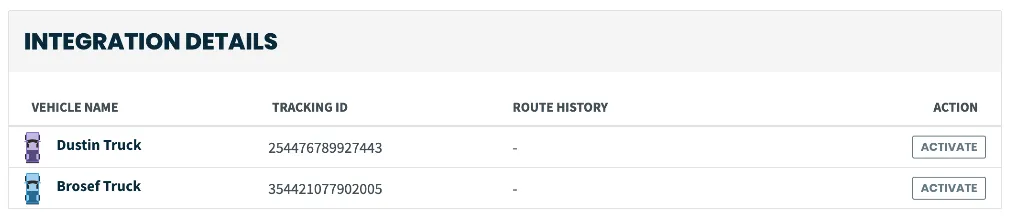
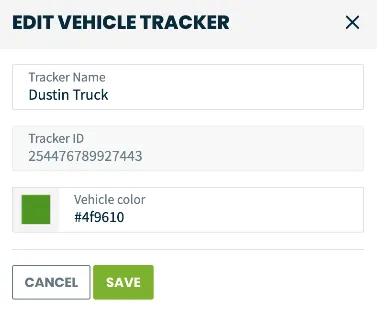
To manage your devices, click the Gear Icon > Settings > Connected Apps > Fleetsharp GPS. This is where you can view your vehicles, tracking ID, and route history. Clicking the option under Action will allow you to edit the tracker name and vehicle color.
Vehicle overlay
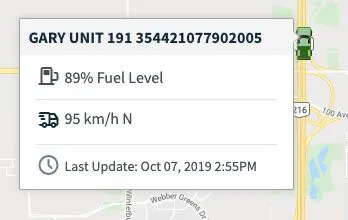
From the map view of the calendar, when you click on a vehicle you will see stats about that vehicle. You will see the device name, speed and direction, fuel level, mileage, and the check engine light.
FleetSharp reporting
If you are looking for more robust tracking and reports, FleetSharp offers a variety of reports on their website as well as a free app. Their reports include statistics like engine diagnostics, safety reports, idling reports, route replays, and mileage.
You can login to the FleetSharp portal here.
Customer portal reset
If you ever run into an issue where your FleetSharp device is unresponsive, these are the steps you can take to reset it.
Note: These steps take place in FleetSharp’s platform, not in Jobber.
1. You will need to login to your FleetSharp portal via desktop with a compatible browser of Google Chrome or Firefox.
2. Locate the offline device in the tracker list.
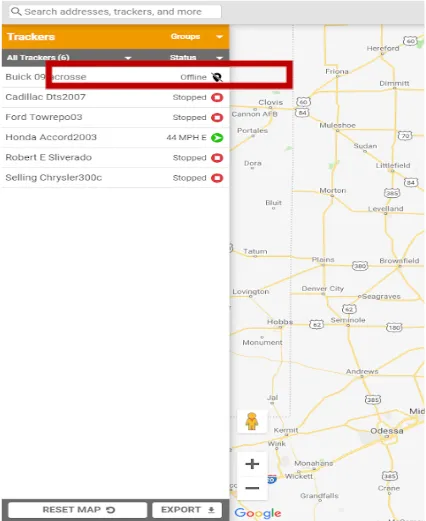
3. Select the offline device.
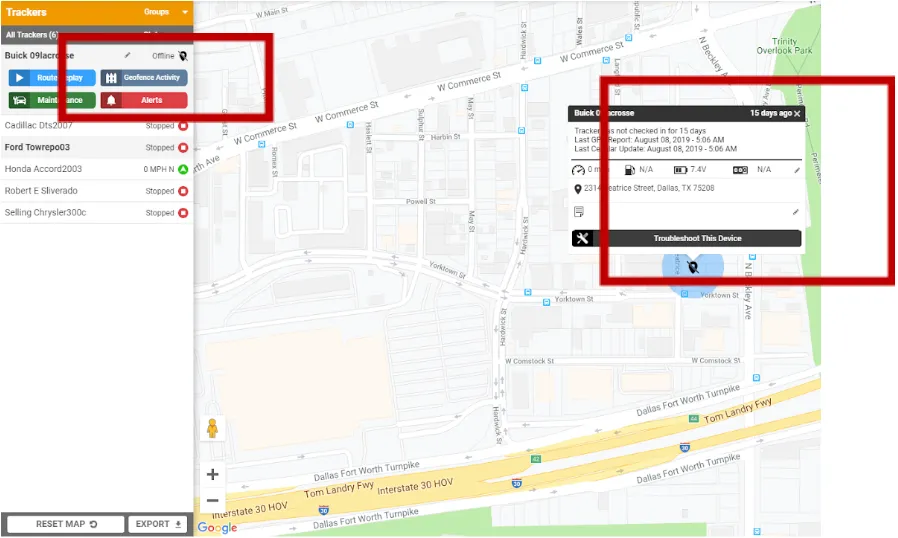
4. Click “Troubleshoot This Device” on the offline tracker, and a pop-up window will open to reset the tracker.
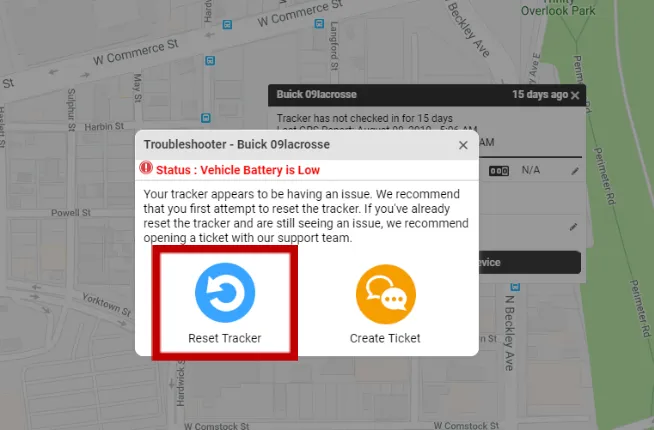
5. This will send a reset to the offline device.
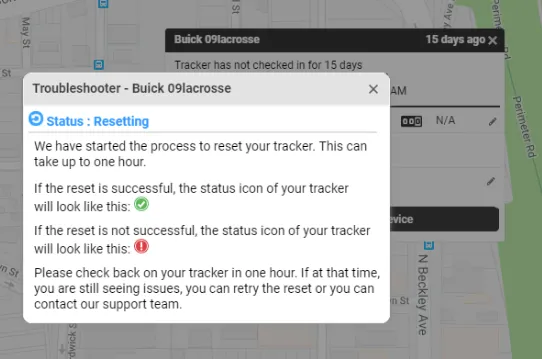
6. Sit back and wait for up to an hour. If the device does not come online within the hour, contact FleetSharp Support (844.498.9450)
Questions?
If you have questions about Jobber’s FleetSharp integration, reach out to FleetSharp for support.
- Email: support@fleetsharp.com
- Phone: 844-498-9450