
Overview
In Jobber, clients own properties and properties are the locations where work is performed. Properties are associated with quotes and jobs. Invoices are associated with a client’s billing address, but if the invoice was created from a job, then the property address from the job will also appear on the invoice. If you are batch creating invoices from jobs, then you might have multiple properties associated with an invoice.
Create a property
There are multiple places in Jobber where you can create a new property:
Create a new property while creating or editing a client:
- Select Create from the side navigation.
- Select Client, then enter the property details for the client.
Create a new property from the property section on a client’s profile:
- Navigate to the client’s profile.
- Locate the Additional properties section of the page and select Add Property.
Create a new property while creating a new work item (such as a request, quote, job, or invoice):
- Select Create from the side navigation then select the type of item you’d like to create.
- If you are creating a new client for the work, you will have the option to create a new property for that client.
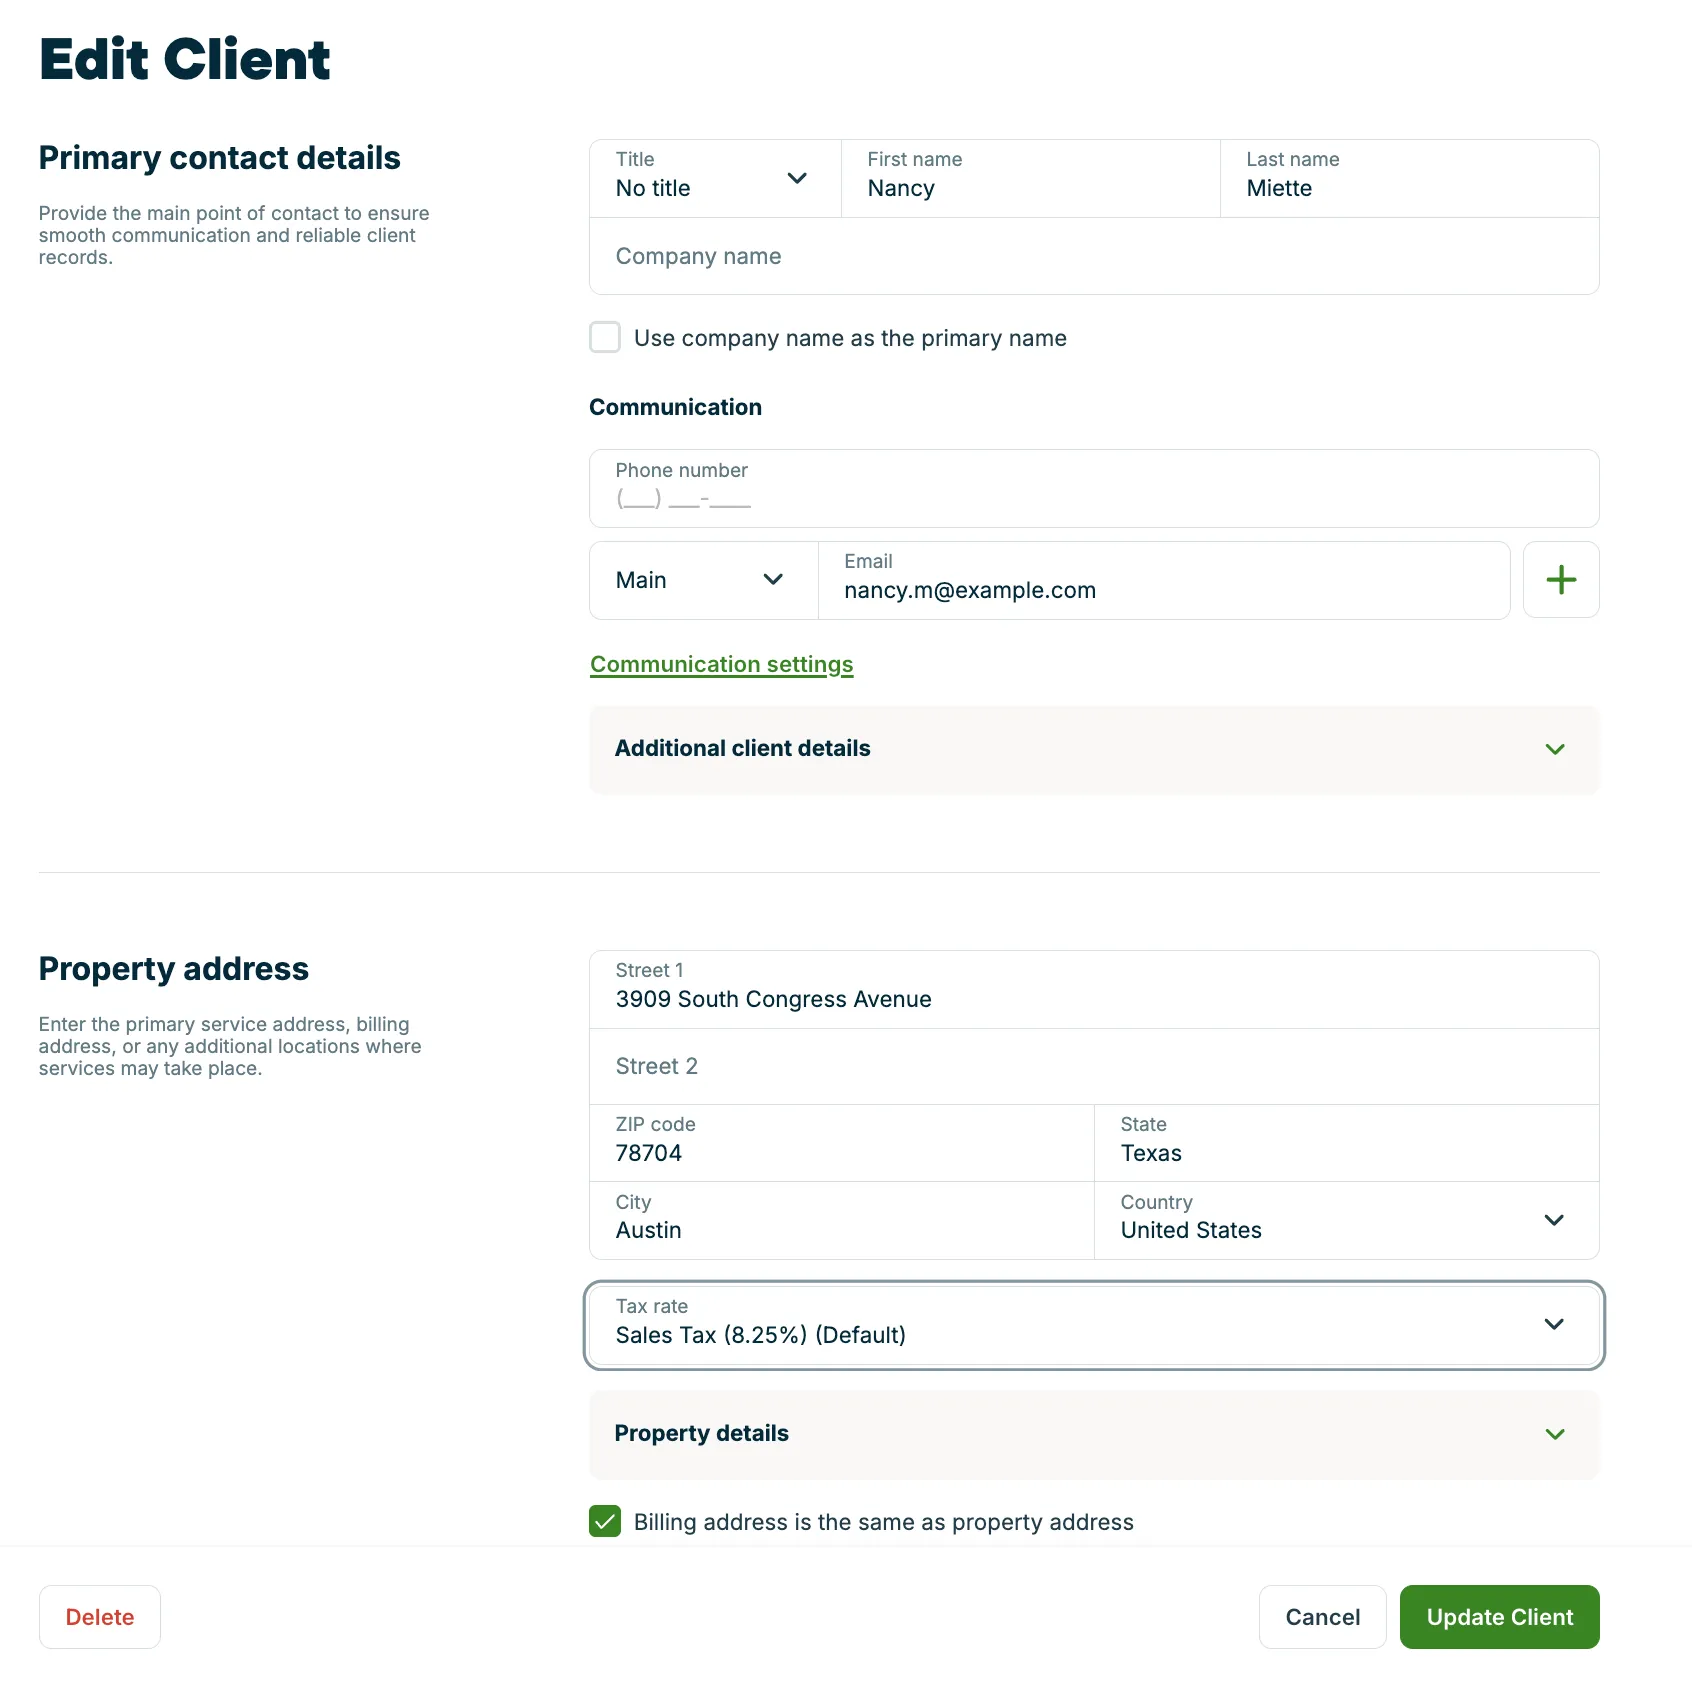
The steps below walkthrough how to create a property while adding a new client. At the top of the page, you’ll enter the client’s primary contact details. Below that, you’ll add the property information.
Every property must be associated with a client, but a single client can have multiple properties.
To learn more about adding client information, check out our article on Client Basics.
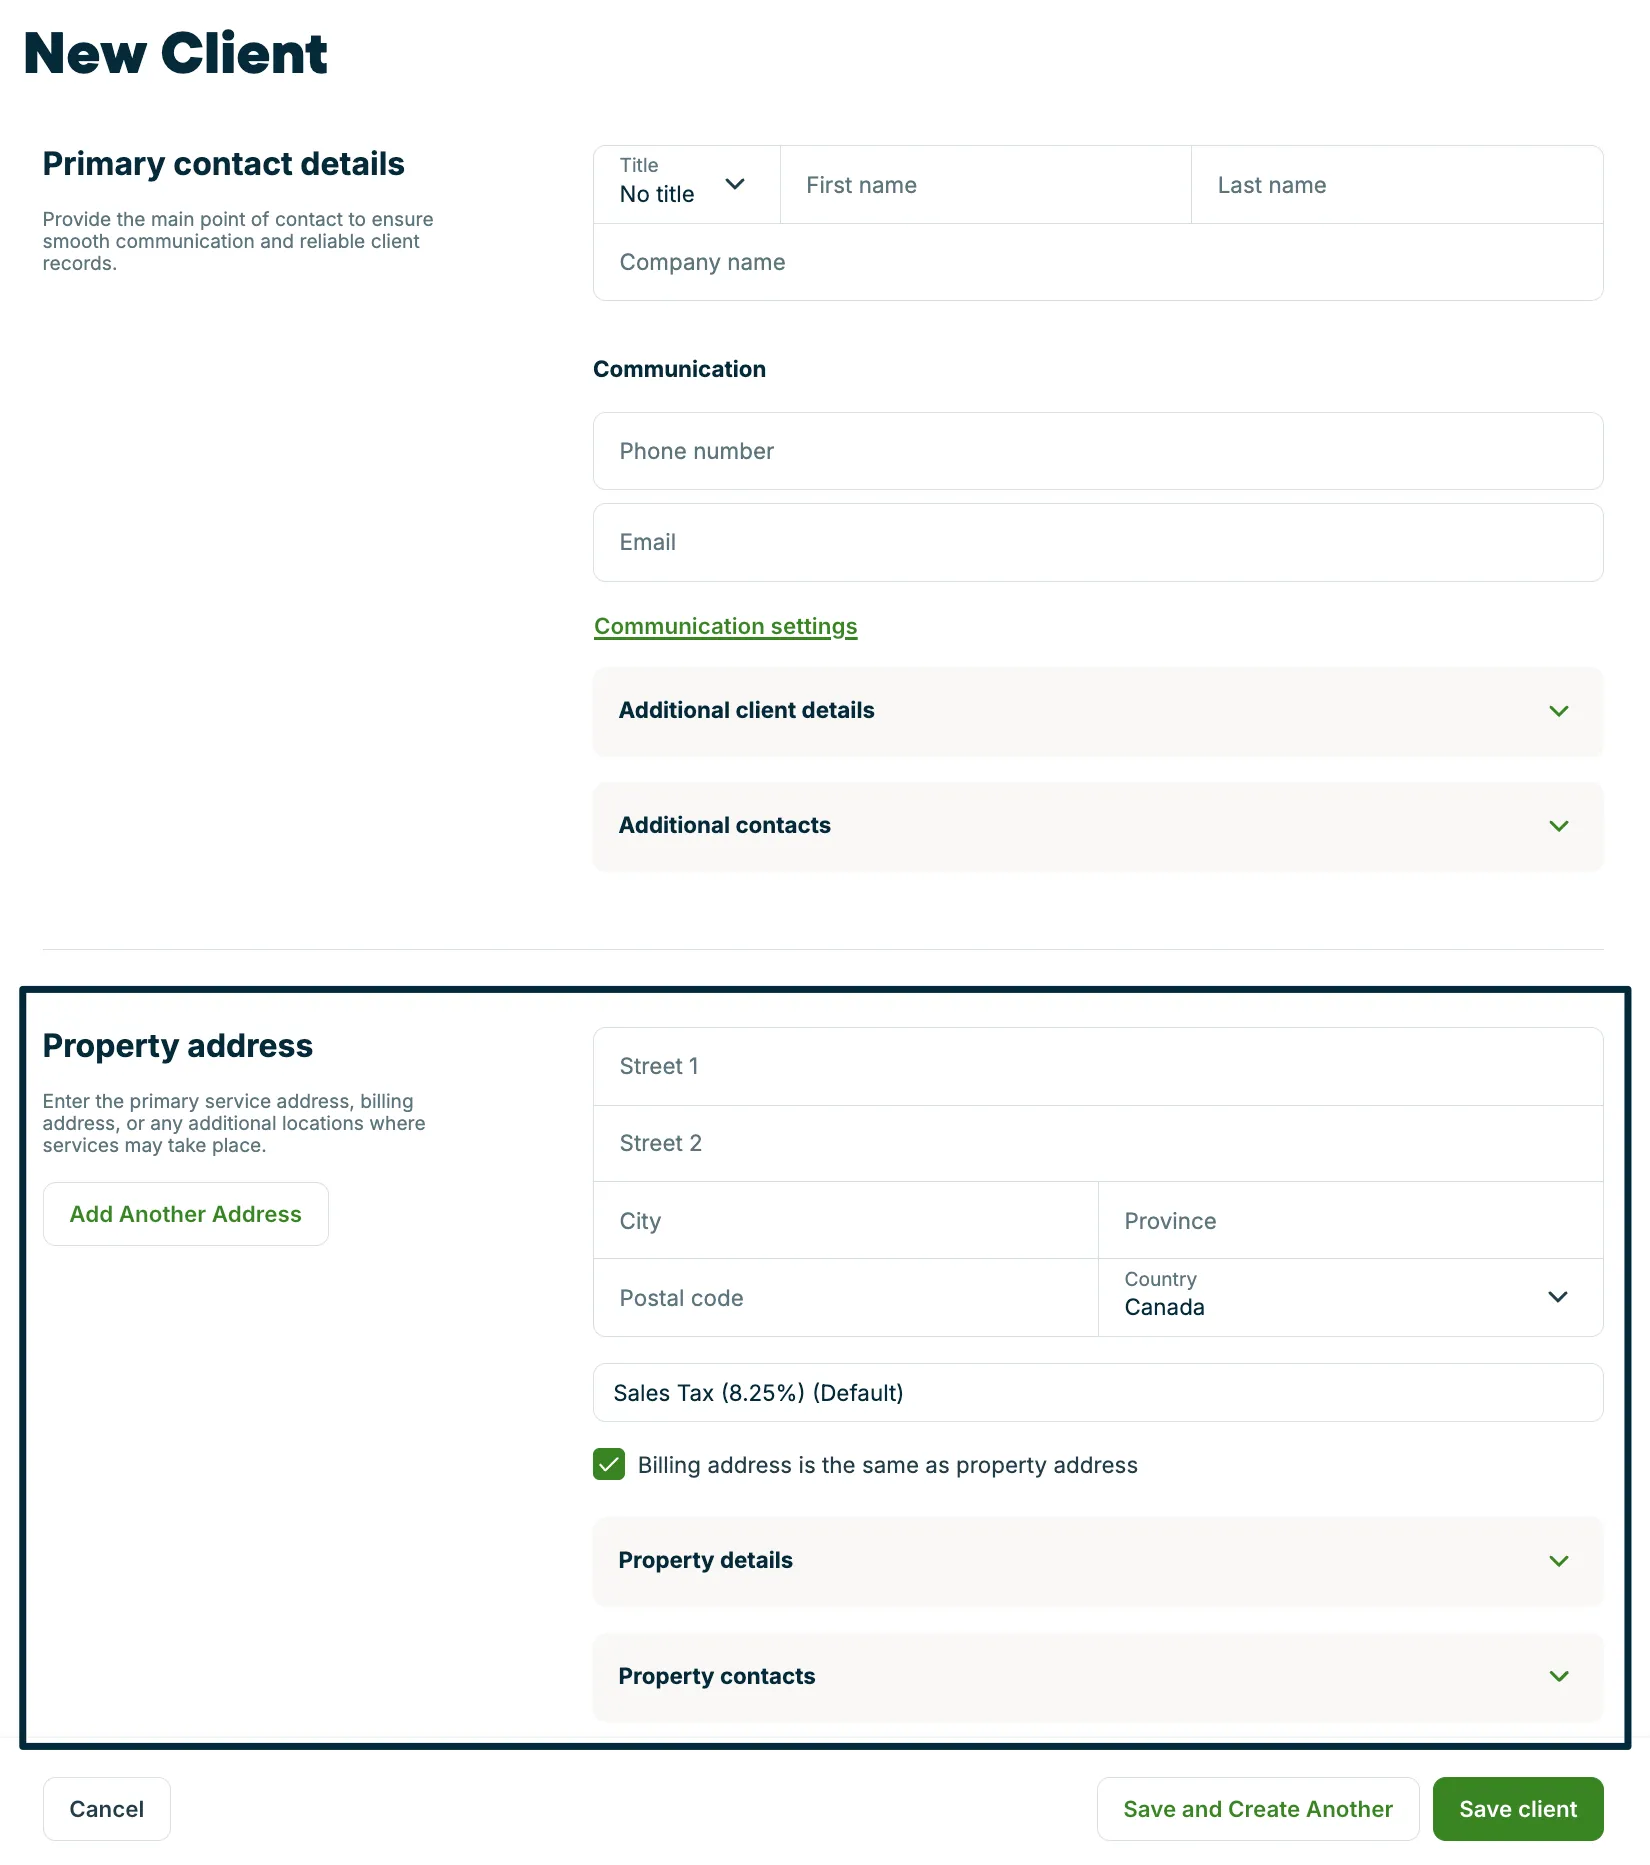
From the property address section, as you begin typing the property address in the Street 1 field, suggestions from Google Maps will appear. Select the correct address from the list, and the remaining fields will automatically populate for you.
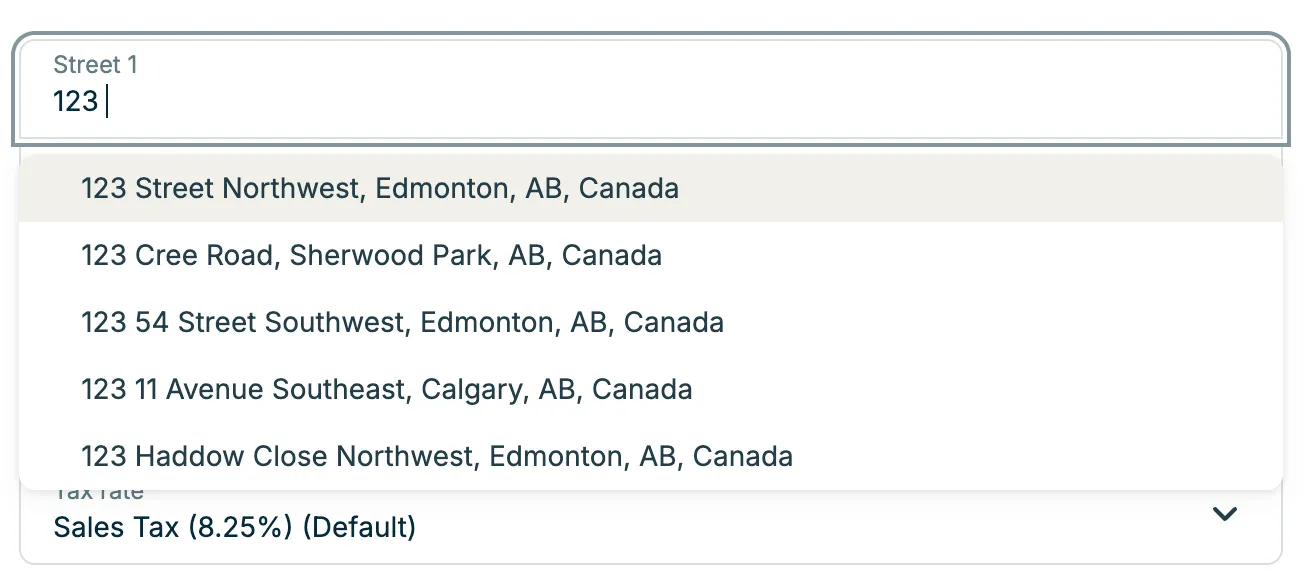
If the autofill in the property search isn’t locating your property, you can enter the property details yourself manually instead of using the autofill. Type the property address in the field, then do not click on the suggestions—just continue typing the full address manually.
Add property details
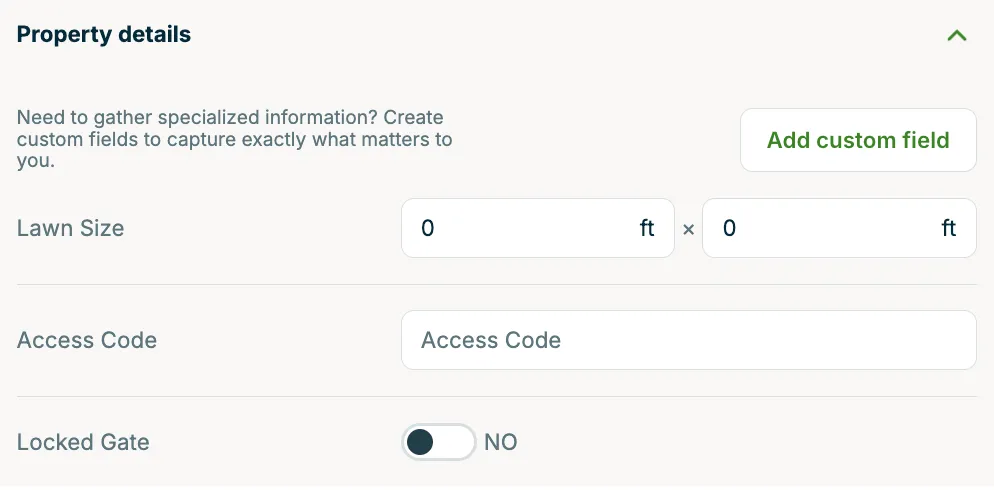
The Property Details section of the new property page is where you can view and fill out any property level custom fields you’ve set up.
To create a property-level custom field:
- Create a new client or click the pencil icon on an existing client to edit.
- Scroll to the Property details section and expand it.
- Select the button for Add custom field.
Note: In addition to the client create or edit screen, property-level custom fields can also be set up in your custom fields settings.
Add an additional contact on the property
Additional contacts can be added to properties. This can be used when there is a different contact for the property than for the client. For example, a property manager who oversees multiple locations can be added once and assigned to all relevant properties at the same time.
To add a contact when creating a new client:
- Select Create from the side navigation, then select Client.
- Scroll to the Property address section and expand Property contacts.
- Select Add Contact, then fill in the contact’s details.
To add a contact to an existing client:
- Navigate to the client’s profile or the property’s detail page.
- In the Contacts section (client profile) or Additional contacts section (property page), select + to add a contact. If no contacts exist yet, this will appear as Add Contact instead.
- Fill in the contact’s details.
Note: While you can create a property in Jobber in several ways, property contacts can only be added or edited from the client create or property edit screens.


For the additional property contact, enter their:
- First Name / Last Name: The full name of the contact.
- Role: What is this contact’s role in relation to this property? For example, are they a tenant?
- Set as billing contact: Check this box if this contact will be handling the bill for the work you’re completing. This contact’s email address will be an option when sending quotes and invoices.
- Phone number: Enter this contact’s phone number. This is the phone number that will receive text messages from Jobber for the communication types selected for this contact.
- Email address: Enter this contact’s email address. This is the email address where messages from Jobber for the communication types selected for this contact will be sent.
- Properties: Select the properties this contact should be associated with. You can assign a contact to more than one property at a time. If you’re adding a contact from a specific property’s page, that address will be pre-filled, but you can add additional properties as needed.
Next, select what kinds of automated communications this contact will receive. These are the same communication settings options as for contacts on clients, but for the property contact. Learn more about communications settings on clients and contacts.
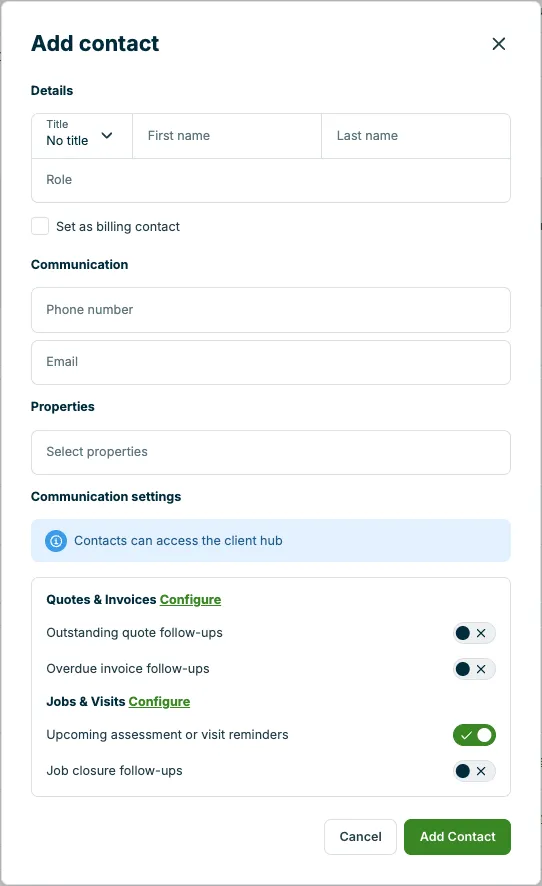
Select Add Contact to save this contact under your newly created property.
Note: Clients must have a name and a contact method (either an email address or phone number) entered in order to save the new client.
If you need to make any updates to the property in the future, you can go back into the property edit screen from the client profile by clicking on the property address. This time, it won’t show the property search bar. Instead you can manually make changes to the address.
Note: Once a quote or job is created with a property, the property address cannot be changed on the job.
View properties on a client’s profile
From the client’s page, click the property address to open the property details page. You can also navigate here by using the global search and searching the property address.
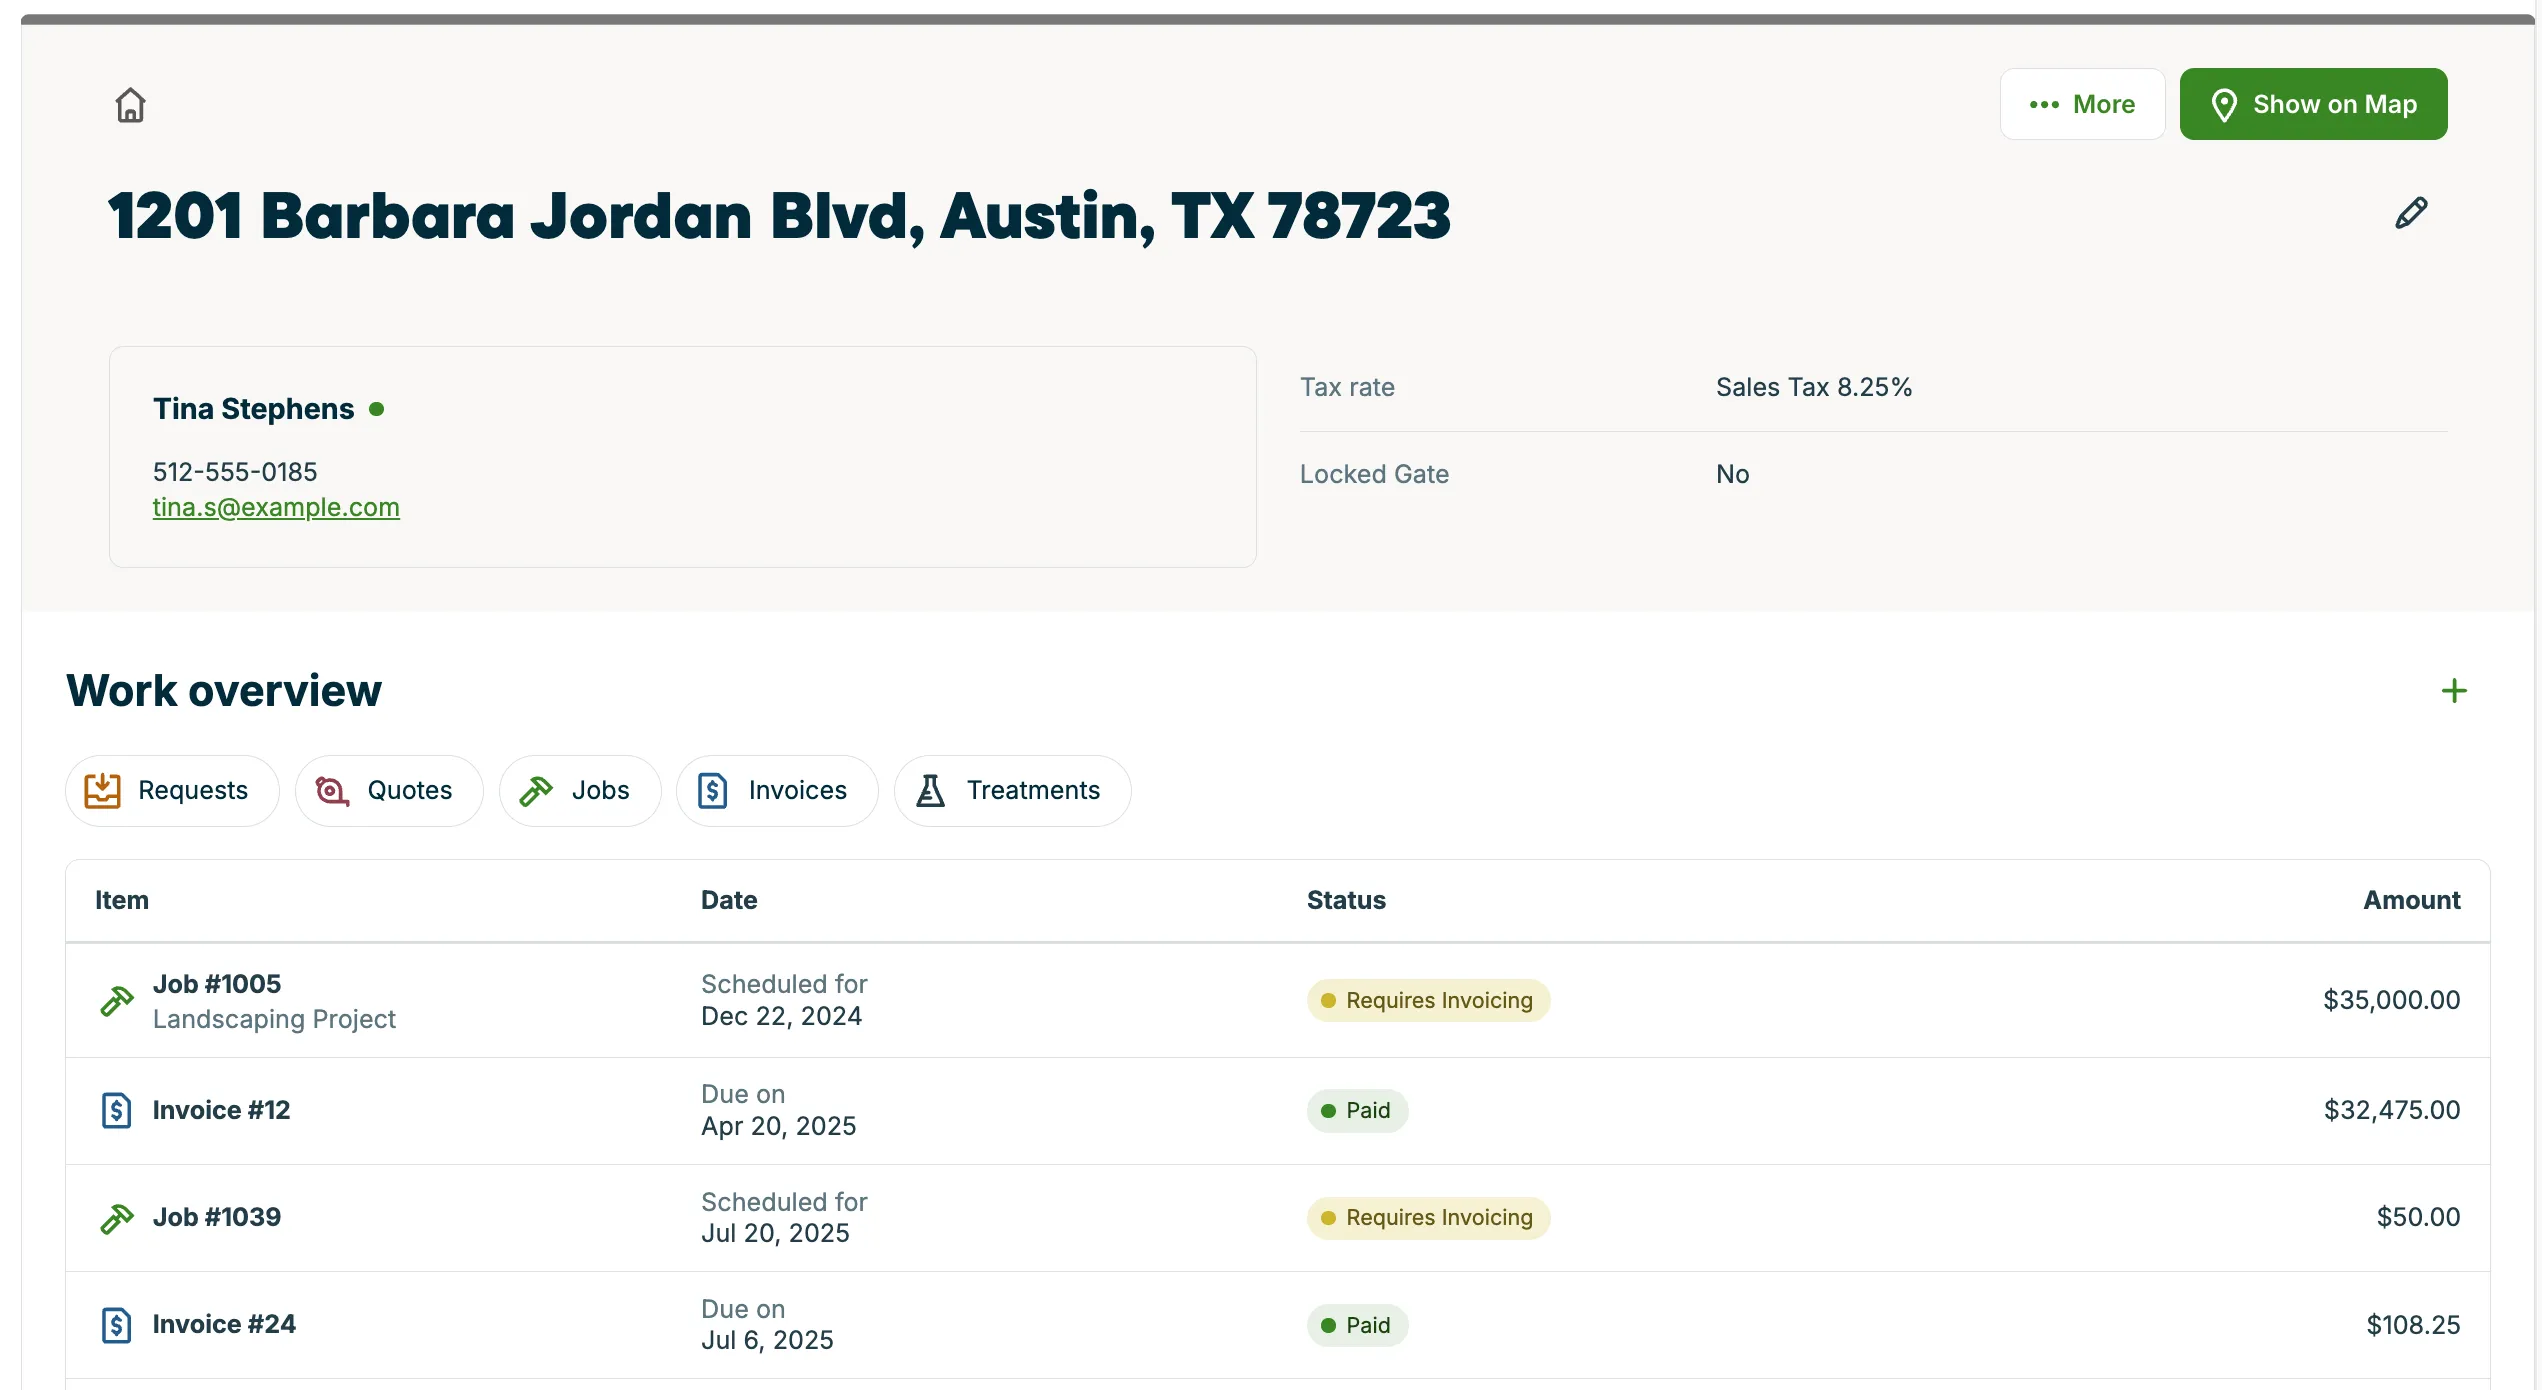
The property details page is where you’ll find an overview of all the upcoming and past work at that property address.
From the Work Overview section, there are tabs to view the property’s:
- Requests
- Quotes
- Jobs
- Invoices
- Treatments
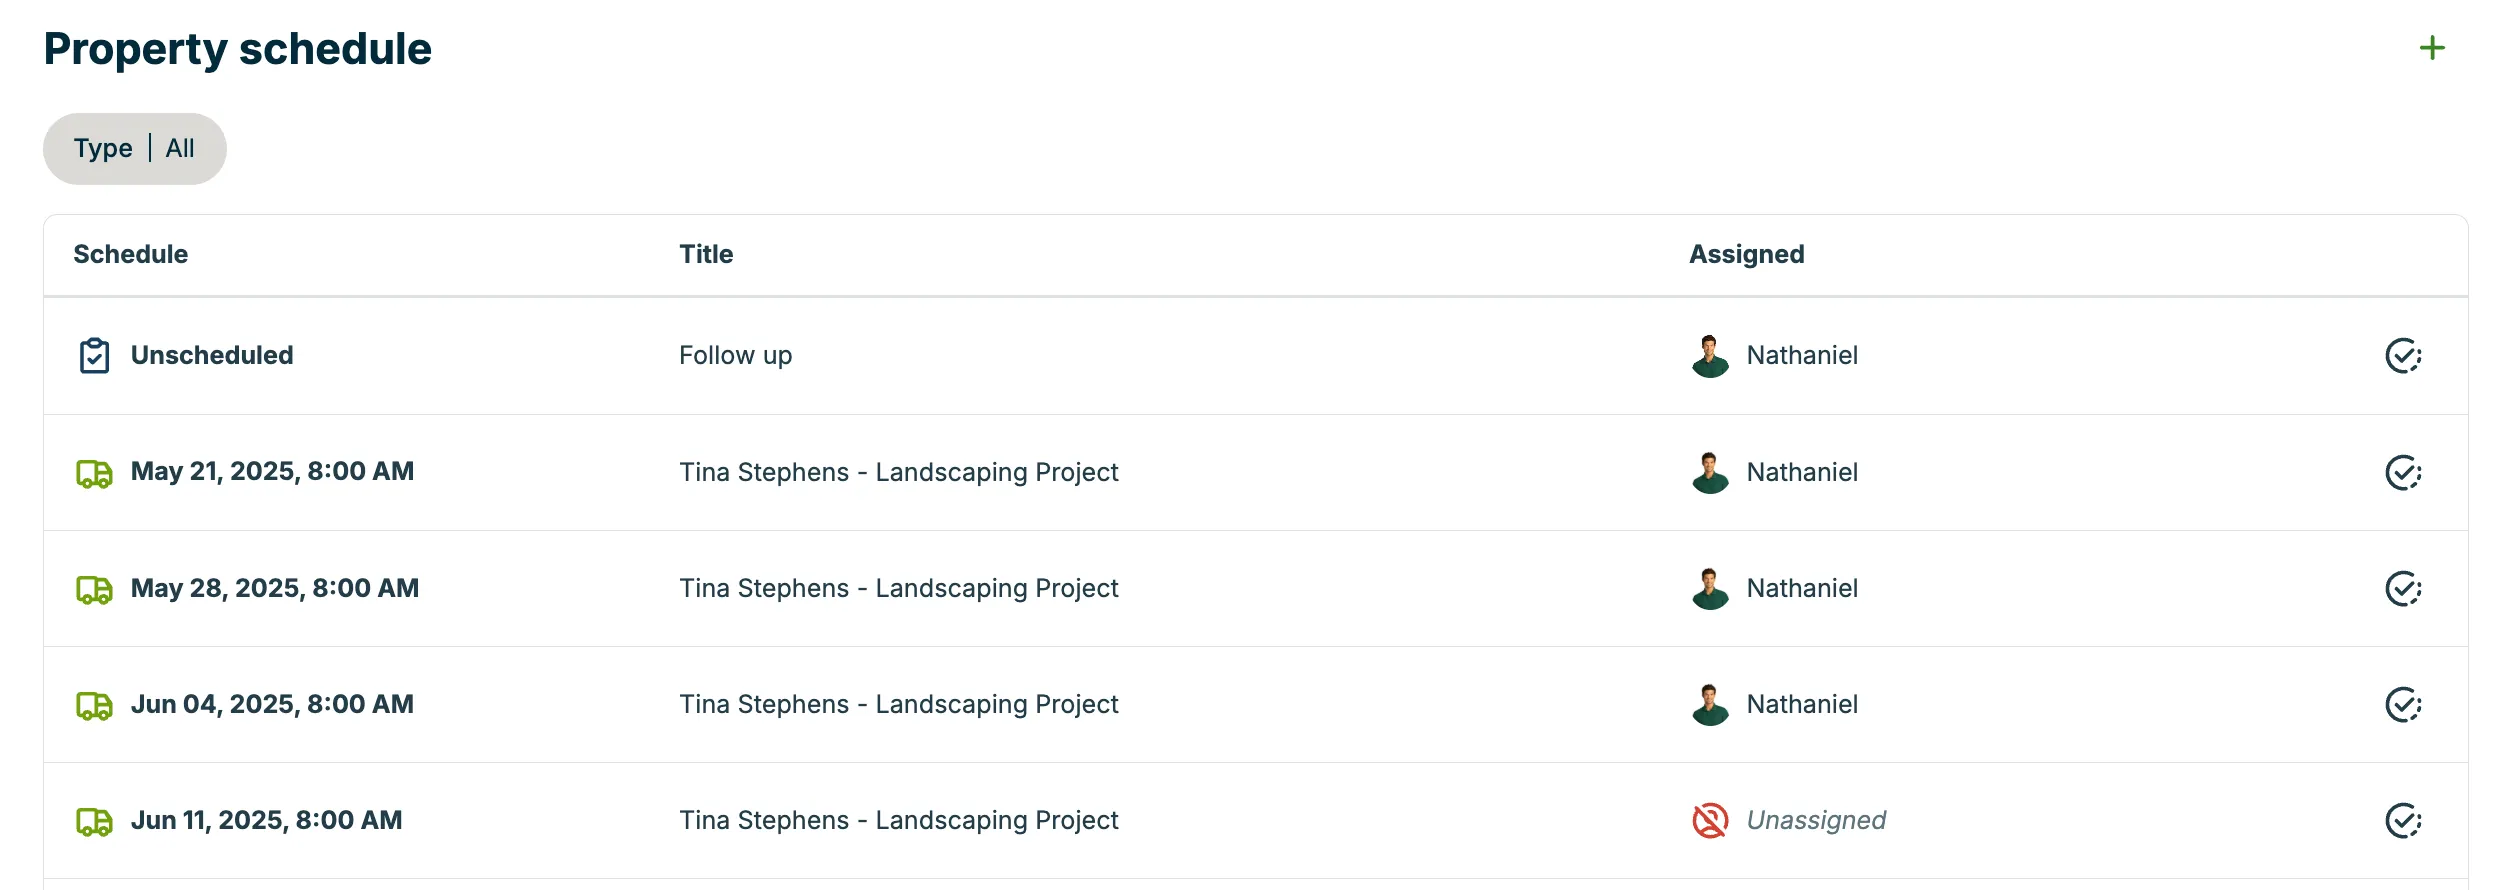
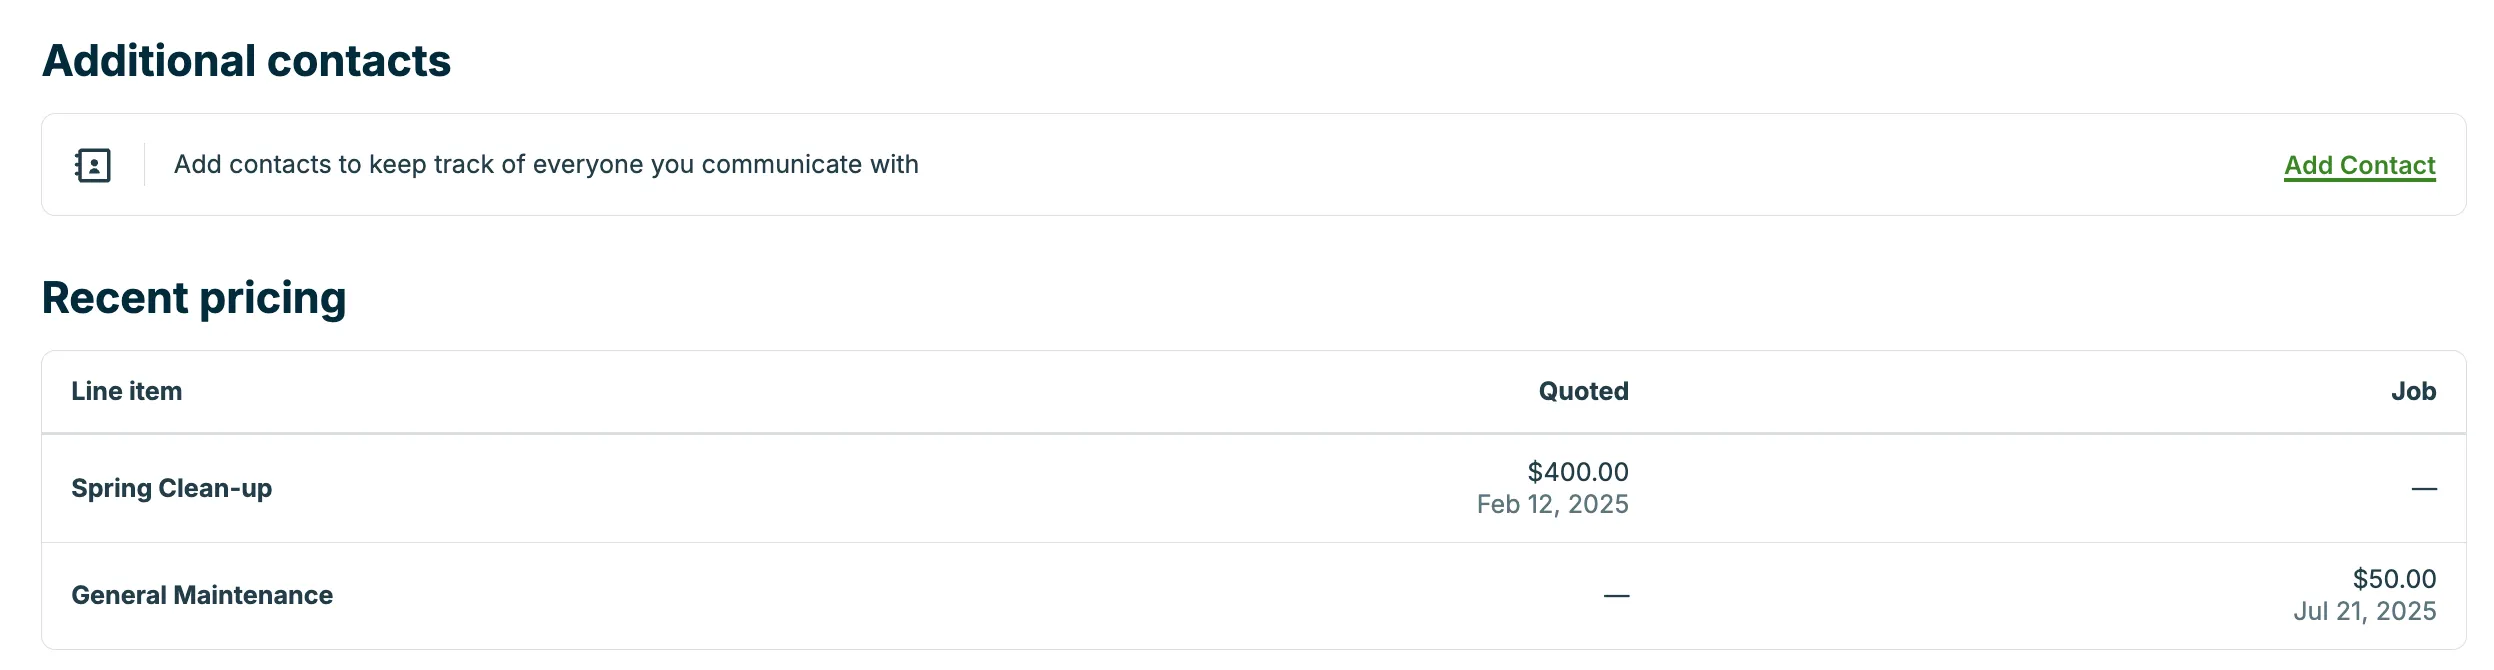
The property details page also breaks down the property schedule, additional contacts who are included in select communications for that property, and pricing most recently used at the property.
Adjust a map pin for a property
If a property isn’t properly geolocated when getting directions, you can adjust the map pin for a property so that it directs to the right location in Google Maps. You might also need to adjust the map pin if you see the red map icon on one of your visits when using the map view of the schedule.
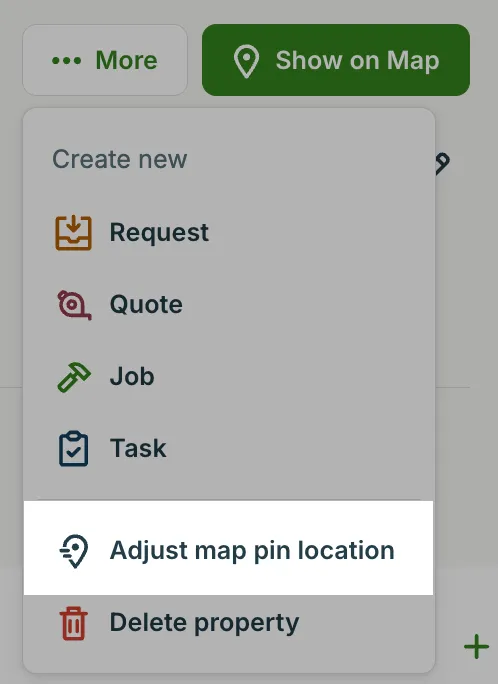
To adjust a map pin, navigate to the Property details page. Then select … More, then Adjust map pin location:
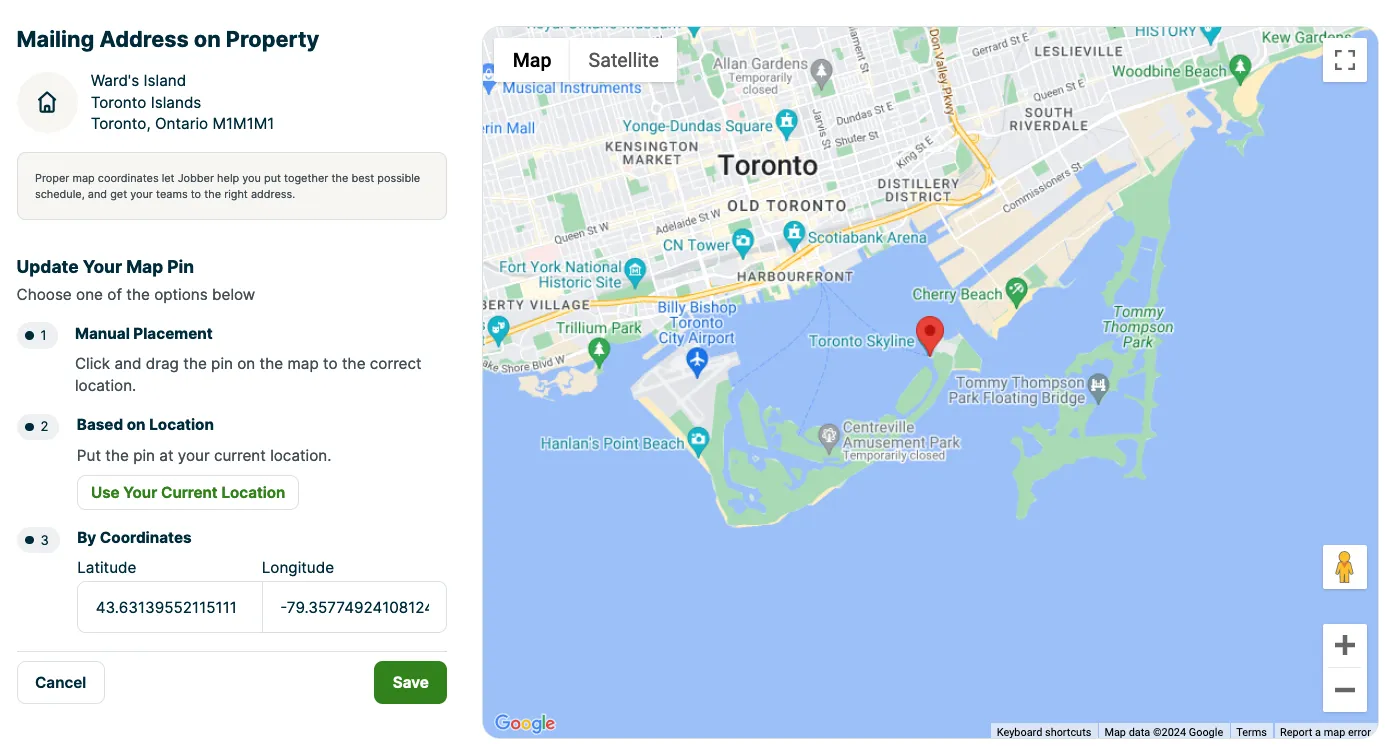
On the Adjust map pin location screen there are three ways to update the map pin:
- Manual placement: click and drag the pin on the map to the correct location, then click Save.
- Based on location: if you are currently at the property, click Use Your Current Location to put the pin where you currently are, then click Save.
- By coordinates: enter the latitude and longitude for the property, then click Save.
Delete a property
To delete a property, navigate to the property page. You can get here by clicking on the property address from the client page in Jobber, or by using the global search.
Deleting a property will delete associated quotes, jobs, and their associated estimate and price figures.
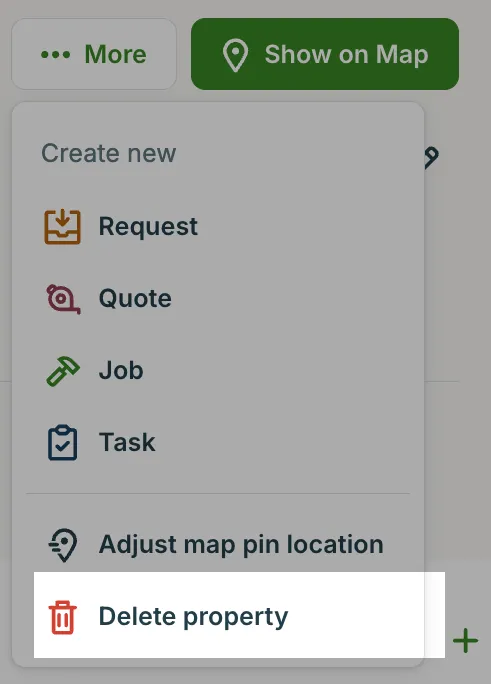
To delete a property, go to the property details page, select … More.
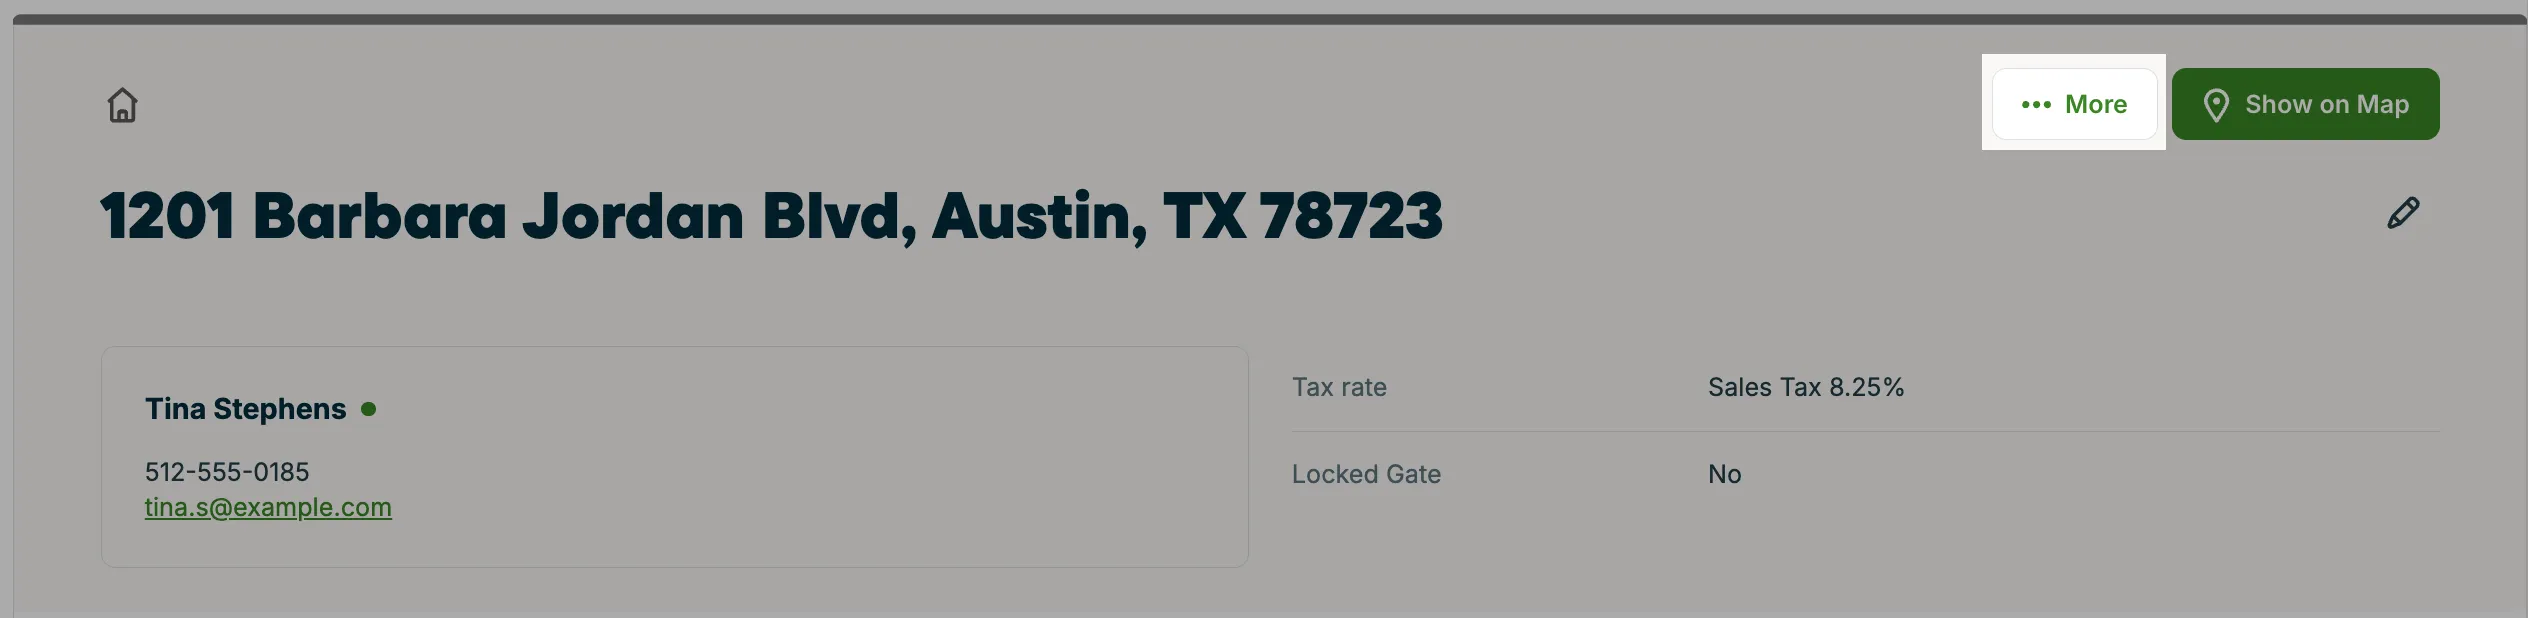
Then from the dropdown, select Delete property.
Before a property is removed, you will be asked to acknowledge this warning:
“Deleting this property also deletes related quotes and jobs, including associated estimates and prices. This data also won’t be included in your reports.”
Select Delete property to confirm that you want to delete the property. Once deleted, the property cannot be recovered.